

Oh windows and doors. I love them. Except for when I have to install them, and then I hate them. Ok, maybe not hate. But they are annoyingly time consuming with the flashing and the rough openings and the trim.
And like just about everything else on the tiny house build, it took a bit longer to install all the windows that we initially anticipated. Go figure. And while we are certainly not experts, we know a lot more about window installation now than we did a few weeks ago. So check out how we did it and feel free to have a chuckle at our misadventures.

First off, all of our windows and doors are used. Well, not all are strictly “used,” but none of them were custom ordered. All but one we bought off of craigslist and the the one we didn’t was a sample from a local window company. Even that window was supposed to be one we got off Craigslist, but when it came time to install we realized it just wasn’t going to work and had to scramble to find one that was a similar size to the opening we had created. We still had to alter that opening a bit to fit, but that’s really nothing new.
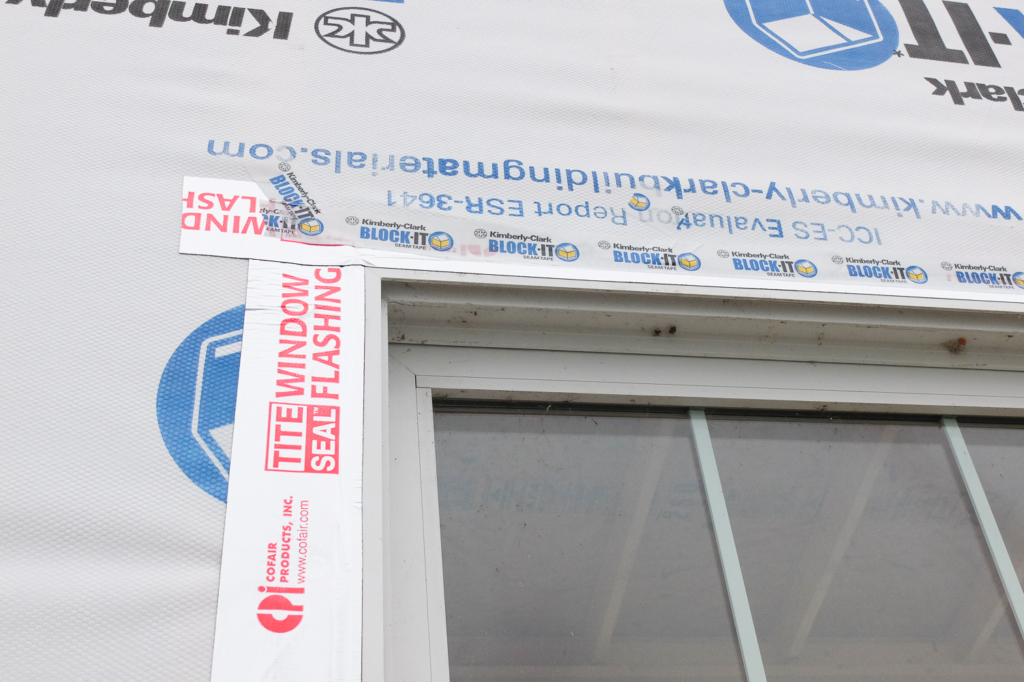
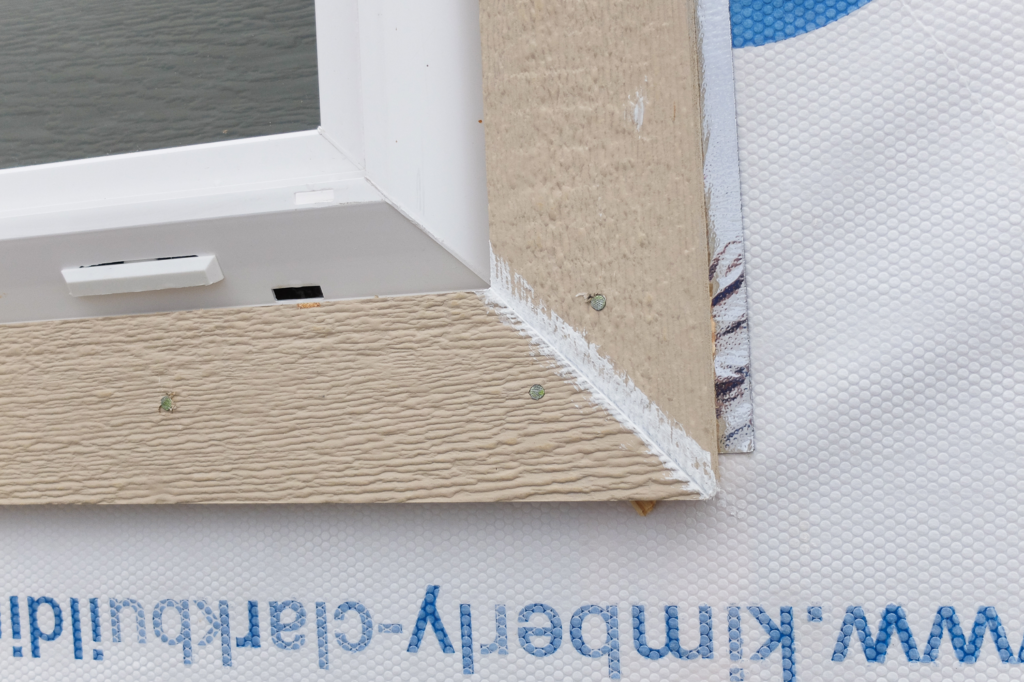
See, I don’t know if we measured incorrectly or cut 2×4’s incorrectly or my dad laid it out in Solid Works [3D engineering software that we used draw up our plans] incorrectly (we’re going with this one if only to make ourselves feel less foolish), but probably half of our windows openings were wrong, which we didn’t realize until it came time to flash and install them. So that was fun. Headers had to be cut and moved up or down, boards had to be inserted to decrease opening widths, it was a mess. Plus we didn’t get the advice to slant our sills downward to encourage water from sitting until after we had already built the walls, so we had to get creative with 1/4″ board and/or a belt sander before the flashing went on.
And because we used non custom windows, we got creative with a few and did something the manufacturers would frown and shake their heads at: we turned some of them sideways to be long instead of tall. With most it wasn’t a big deal. A couple we had to remove the springs inside, not too difficult, and some will have to have small drain holes drilled in them to ensure water doesn’t collect in the tracks at the new “bottom,” but I’m pretty sure it’ll be fine. Ask me in a few months.

We used a self adhesive aluminum flashing, which just happened to be what the nearest building supply store had in stock. It worked well until it got cold and then we had to break out a hair dryer (a super handy construction tool) to warm it up enough to make it stick. But I’m pretty sure we did it wrong. It’s hard to say. YouTube videos do not an expert make, no matter how many you watch. In any case, I think we went through 5 rolls of the stuff, and everything looked pretty sealed up, so I’m satisfied. But I do have to keep turning off the “just get it done!” voice in my head by telling myself that this is my home and it has to be done right. I’m a very goal-oriented person and I do tend to sacrifice quality in order to hurry to the finish line. Not this time. Do it once, do it right. Probably should have started reciting that mantra during frame building…
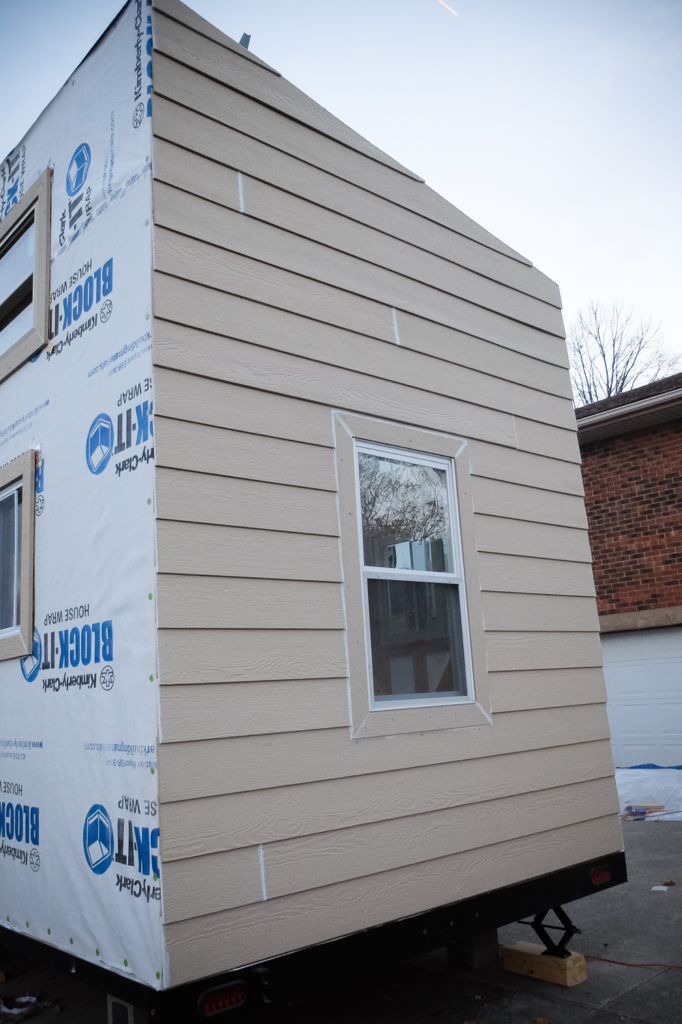
After the windows were installed we hung the window and door trim. It seemed like it would be easier to attach the siding and then cut holes for windows through the rough window openings (we’d seen this done a few times), but between the type of windows we had, not wanting the trim to stick out too far and get us in trouble down the road, and trying to figure out the flashing, we went with installing the windows, then the trim, then just doing a lot of measuring for the siding. It took two solid days to get it all up. But when we did we could stand back and say it was actually starting to look like a house!
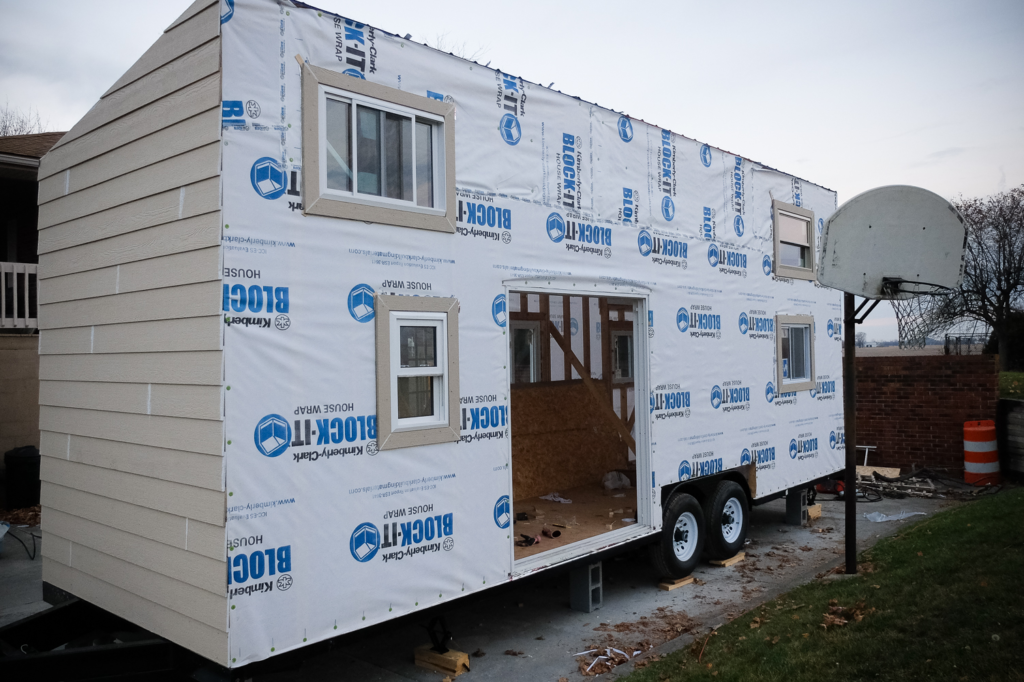
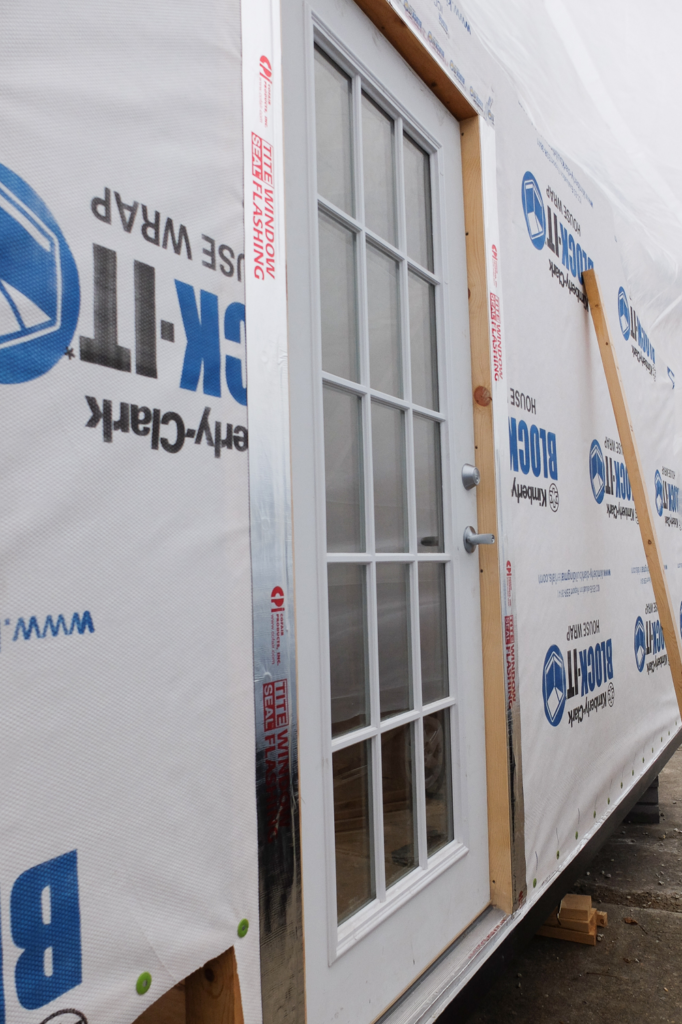
One thing I did notice, though, was that windows that looked huge in the garage or sketched out on plans appeared to take up much less room once they were hung and blocked by siding. Next time I won’t be afraid to go a little bigger, but I’m still happy with size and placement, especially with our big glass doors! I initially wanted two sets of French doors opposite each other, but we ended up going with one sliding glass door that we paid $20 for on Craigslist and a glass door from the ReStore ($15). The sliding glass door we still need to get new hardware for because the previous own didn’t have keys anymore and we had to build a door jamb and install a handle and deadbolt on the glass front door, so it did take a bit more time and energy, but doors are expensive, so monetarily speaking I think we still came out on top.
Alisha is a freelance outdoor journalist and photographer based in Ogden, UT. She loves backpacking, hiking, mountain biking, kayaking and snowboarding (even though she’s terrible at it). She’s also pretty sure she’s addicted to coffee. alishamcdarris.com
Alisha McDarris
Friday 30th of December 2016
Thanks, Martin! It was a lot of work getting those windows and doors to fit perfectly! But we're happy with them!
Martin Williams
Friday 30th of December 2016
Good Job Alisha, Windows & Door fit perfectly & looks nice on Tiny house.