Up to 50% Clearance Clothing & Footwear + Extra 25% Off REI Outlet.
The best backpack is the one that fits
So you’ve decided to go on a country-hopping jaunt, eh? You’re going to explore as many places as possible in a limited amount of time and you’re certainly not going to be staying in a hotel (those cost way too much money). What you do know is that there’s no way you’re lugging a full-sized rolling suitcase behind you everywhere you go (besides, those budget airlines charge an arm and a leg to check those things). So what’s a lowly traveler to do? Buy yourself the best backpack you can afford, of course!
Now, I’m not talking about your everyday school bookbag, here. No, I’m talking about a legitimate 50+ liter, reinforced, custom fitted pack that can go from a weekend at the cabin to a wilderness excursion to a trek around the world. But if it’s going to be serving all those purposes, you’re going to want something that’s not only going to stand up to some wear and tear, but fits well so at the end of the day you don’t feel the need to jump into an ice bath to ease the pain in your back and shoulders.

Here’s how to pick the perfect pack that fits correctly
First, head to your nearest locally owned outdoor store. They will have a selection of high quality bags and the expertise to help you pick the one that’s right for you. It’s probably not going to be cheap, but consider it an investment. Hopefully you’ll be using this bag for quite some time and if it fits well, it will save you from plenty of discomfort during your travels. Plus, you’ll be supporting a local business and that’s always a good thing.
If you’re not lucky enough to have one of these Meccas for adventurers near you (like me), the next best option is to head to the big box stores like Gander Mountain, Bass Pro Shops, even Wal-mart and Target have backpacks. Try some on (with stuff in them, of course) and see which ones feel right. If you find one you really like, you might be able to find one cheaper online, but I don’t recommend dropping $150 or more on a pack you bought online and never tried on. It probably won’t end well. Josh tried on at least a dozen packs before he found one that fit just right.
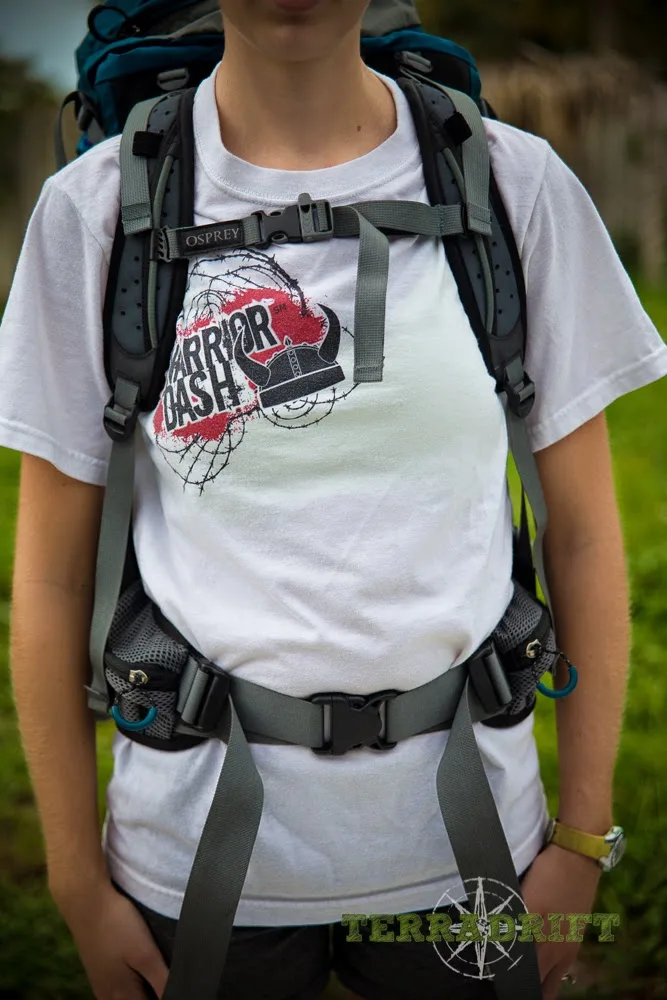
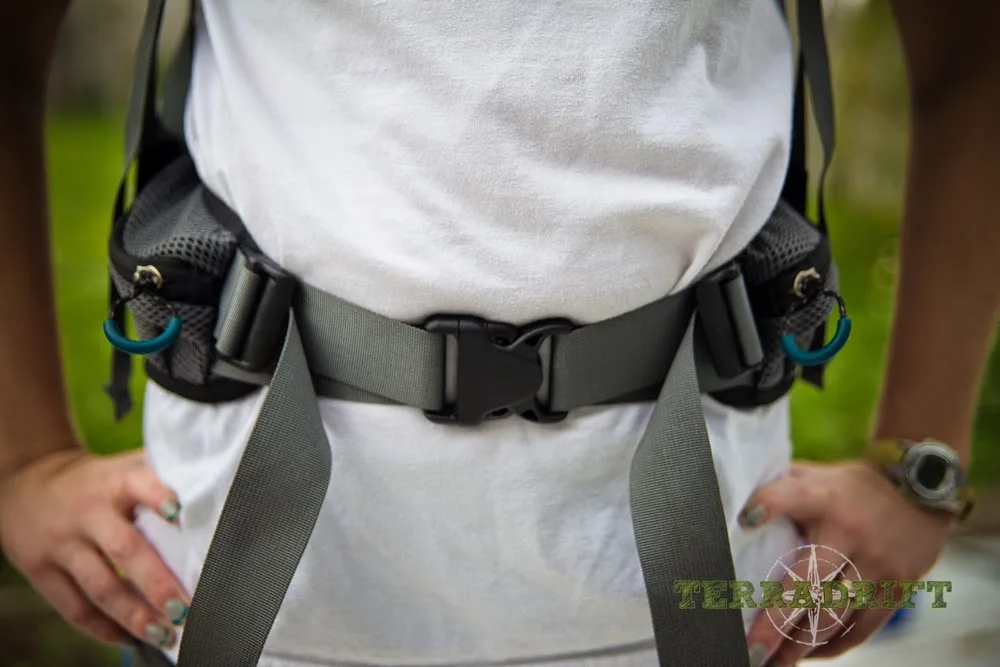
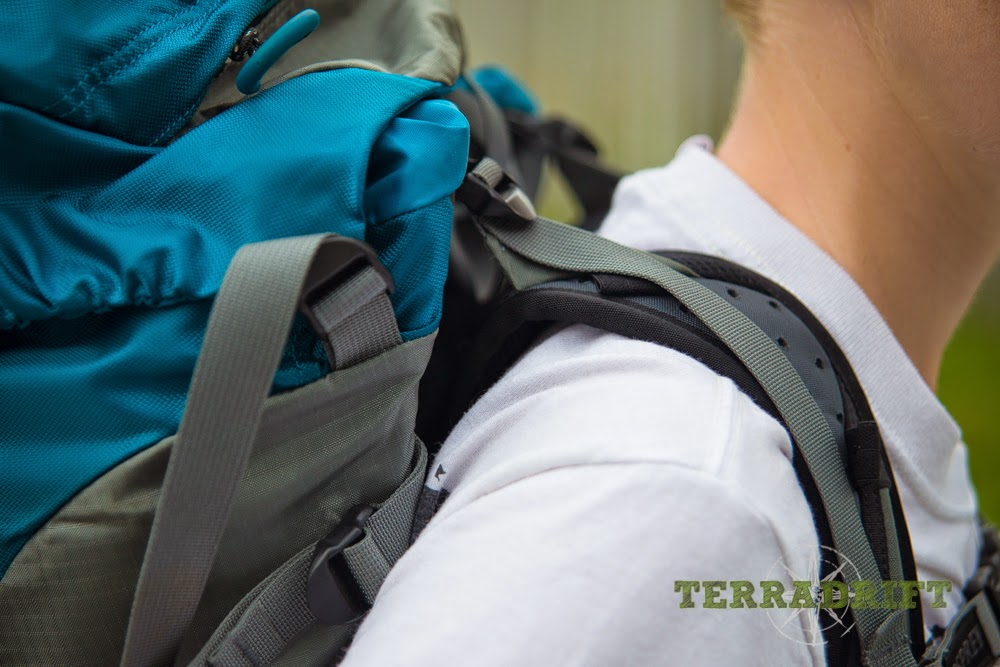
Next, once the pack is on your back (again, with some weight in it!), tighten all the straps until the pack feels snug. Check the placement of the waist strap. The top of it should sit snugly over your pelvic bones. This is where much of the weight of the pack will rest, so make sure it’s comfortable.

Then take a look at the shoulder straps. Stand sideways in front of a mirror and make sure the straps are flush with your shoulders and upper back until the straps connect to the actual pack. There shouldn’t be much space between you and the straps. If there’s too much, it probably means the pack is too big for you and you need one with a smaller frame. (The more popular brands often offer sizes for each pack from small-large.)


The pack should fit the curves of your back. If it doesn’t, check to see if there are bendable bars inside that you can mold to your curves. If there aren’t, put the pack down! If you’ve played with all the straps and it still doesn’t feel right, it isn’t. Move on. Of course, some newer packs, in lieu of those internal frames, have taught mesh lining on the back which is both comfortable and facilitates air flow and conforms to the shape of whoever is wearing it. This is what both Josh and I have.
Another thing to take into consideration are the tightening straps. The first pack I had was a generic size, made for men or women, and I, being the little thing that I am, had to tighten several of the straps as tight as they would go. It felt fine when I tried it on and only had about 15 pounds of gear in it, but once I hit the trails, it proved to not be enough. So make sure there is always a fair amount of leeway when tightening and loosening the straps. Now my pack is a specific women’s small and I love it.
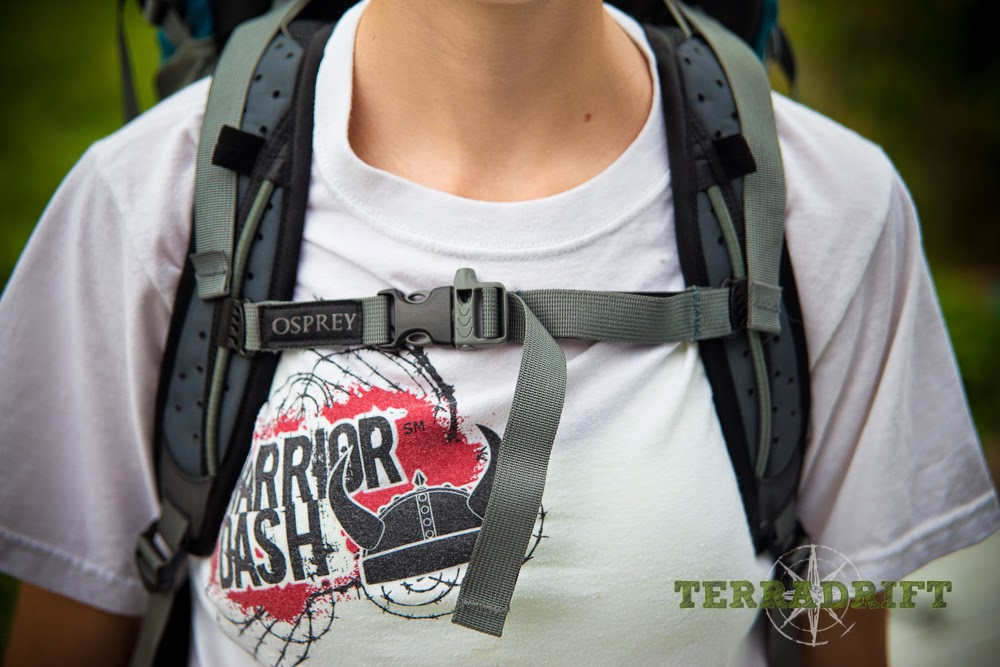
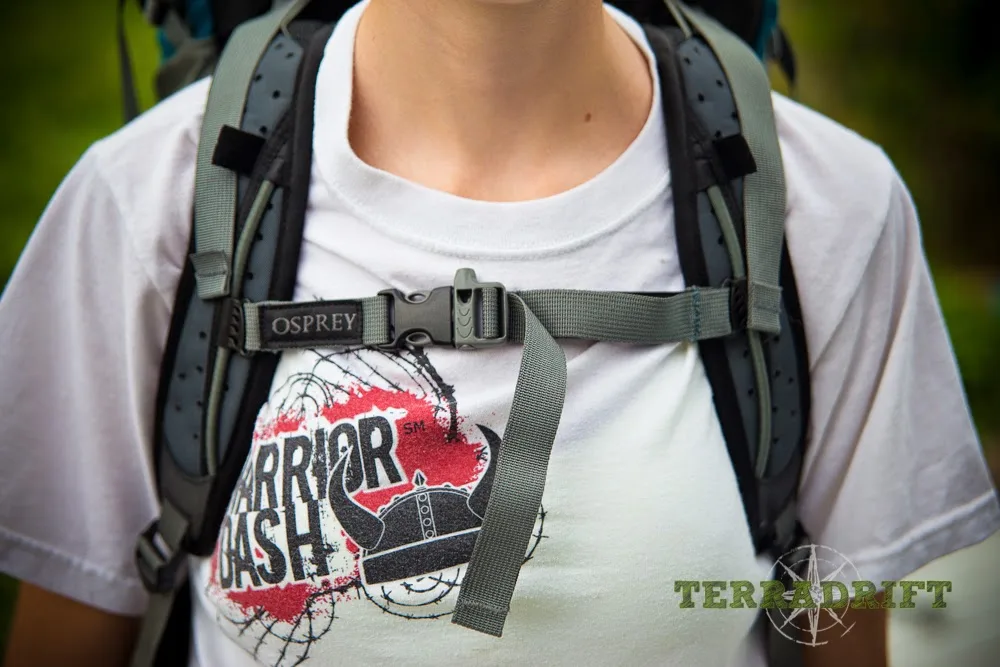
There’s also the sternum strap to consider. It should rest between your chest and collarbone so as to not restrict chest expansion and breathing. It will help keep the pack stabilized and on your shoulders when you’re scrambling up that hill or racing to catch your plane.
All in all, you want this pack to feel like, more or less, an extension of your body. Albeit a heavy extension, but an extension none the less. It should feel like it fits and hugs you well and doesn’t bounce or slide around. After all, this thing is going to be glued to your back for a fair amount of time.
One last thing to keep in mind when buying a pack is how it will be travelling. If you’re using it exclusively for backcountry excursions, go a big as feels comfy (but remember, carrying no more than about 30% of your body weight is the recommendation). If you’re hoping to store it in the overhead bins to save on checked baggage fees, 50 liters is probably the max, but airlines vary in size restrictions, so check it out for yourself.
Remember, an expert pack fitter is the ideal option, but if you have to branch out on your own, keep these guidelines in mind for a happy spine at the end of a long day of travel! And if you’re wondering how big is too big to carry on a plane, check out our guide and video and check with TSA (or AskTSA) for what you can and can’t take on the plane if you’re planning on doing any camping or backcountry backpacking while you’re abroad.
Alisha is a freelance outdoor journalist and photographer based in Ogden, UT. She loves backpacking, hiking, mountain biking, kayaking and snowboarding (even though she’s terrible at it). She’s also pretty sure she’s addicted to coffee. alishamcdarris.com