Up to 50% Clearance Clothing & Footwear + Extra 25% Off REI Outlet.
Let me start right off by saying I loved our tiny house shower and bathtub combo. I loved the way it looked, I loved that I got to have a soak on cold winter days (even if I had to curl up in the fetal position to submerge 3/4 of my body. Unfortunately, we had no idea what we were doing, but sure thought we had a great idea. We built a nice box around our hefty rubberized trough, we hung some dope vinyl tiles on the wall and grouted between all the joints. It was beautiful! It was brilliant!
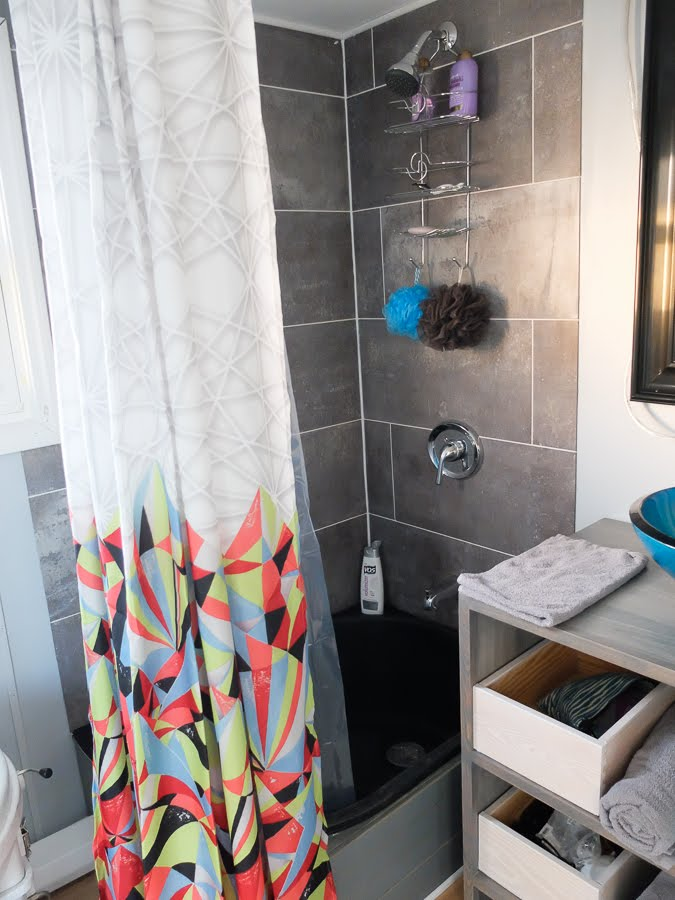

But it also wasn’t terribly functional. Some of you will see the issues right away. Some of you, like me, might need them pointed out but then you’ll be all, “No, it’ll be great! We’ll pull a Tim Gunn and make it work!” And we did. Sort of. But not really.
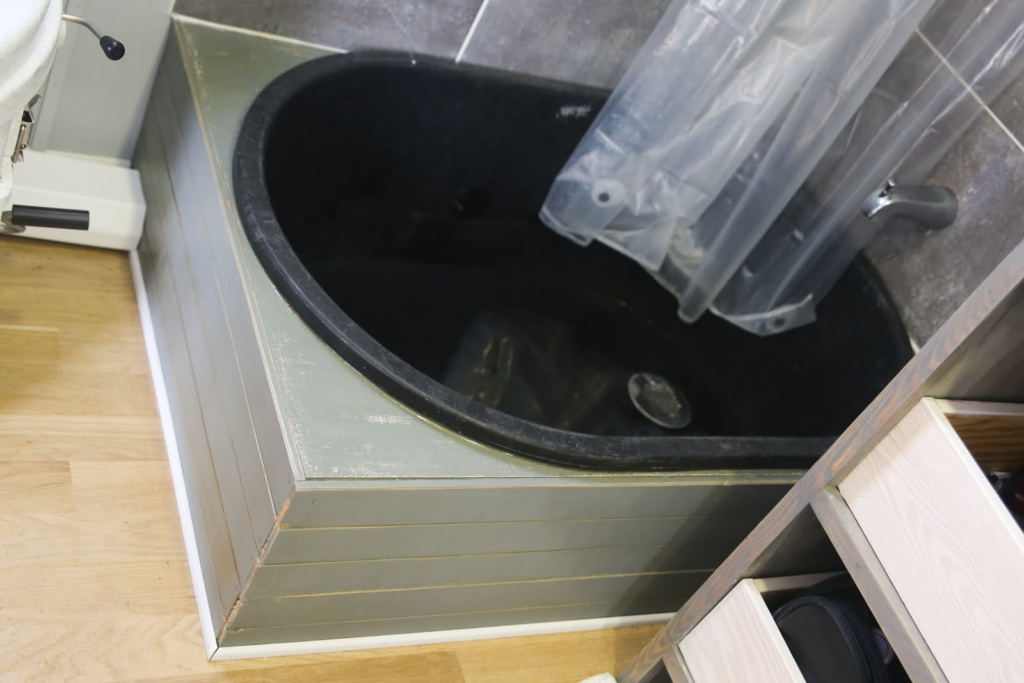

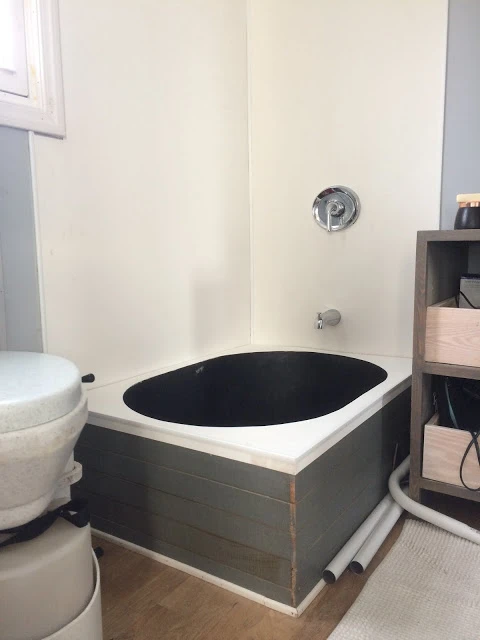
Here was the first issue: see those corners and edges of the box surround? The ones that sit lower than the edge of the black tub? That was a design flaw and it was all on us. Seemed like the easiest way to get a cutout that fit without having to be perfect was to design it so the tub would just drop in and the lip would hide any imperfect cuts or measures. On that count, it worked perfectly. But when one goes to use the shower, water tends to pool in those corners and just sit. And no matter how much sealant or lacquer you put on a wood box, ain’t nothin’ gonna stop collecting water from daily use from damaging the wood.
We tried to solve the problem by putting absorbent material in the corners. But they still needed to be wrung out every day, so that didn’t work. Then we resorted to a full 360 curtain surround, but if it wasn’t closed perfectly water still splashed and sprayed out and made a mess. Plus it had a tendency to make the shower seem a lot smaller. Not something you want in an already relatively close space.
The next problem was with the tiles. I don’t know if vinyl self-adhesive tiles like this weren’t meant to be mounted vertically (probably) or the adhesive we used wasn’t strong enough (possibly) or the movement of the tiny house when we towed it was too much for the grout (you never know), but that crap started to bubble and separate from the wall not long after we settled in.
So finally, after renting our house out all summer and coming back to a bathroom that suffered a bit of water damage from an imperfectly designed system, it was time for a re-haul.

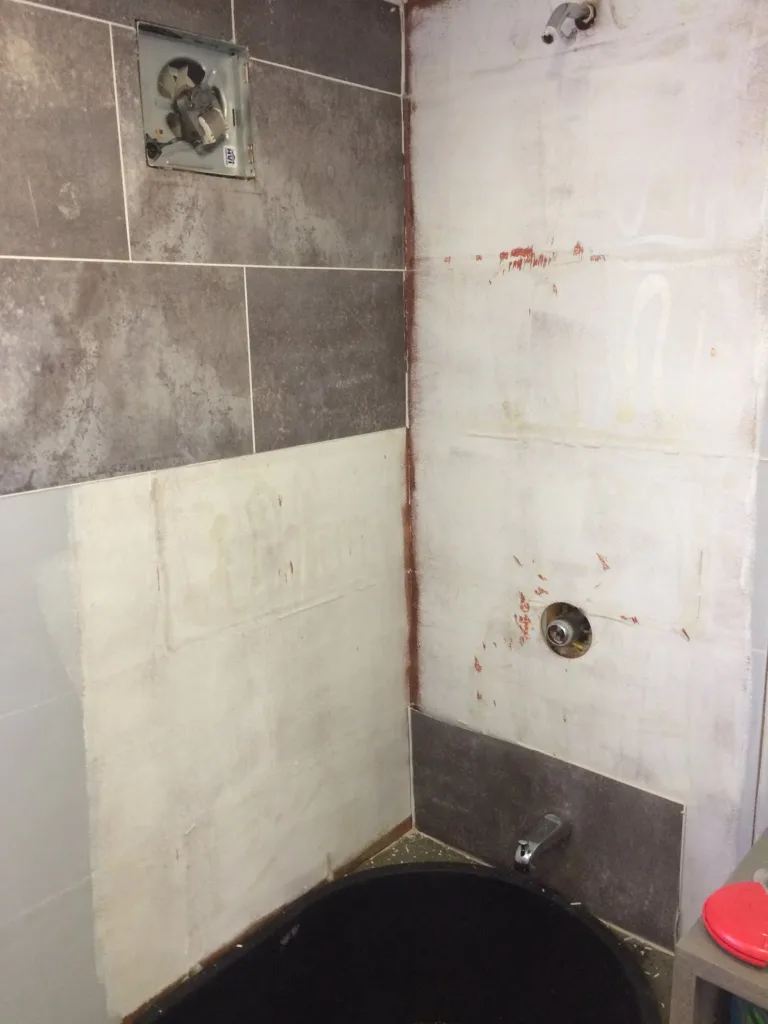
We considered just paying a little extra for a proper shower surround, but when we considered that the drain would have to be in the exact same place as our current drain and couldn’t find a model that was the right size anyway, we gave up on that.
We considered buying vinyl flooring by the foot, painting the walls with that heavy-duty waterproof paint nonsense…you name it, we considered it. But what we ended up with was 4×8 sheets of plastic sheeting found with the decorative wall panels at Home Depot. It was plastic, 100% waterproof, and about 1/4 inch thick. There were even handy little end caps and corner pieces to cover up the cuts we would make that would doubtless be far from straight.

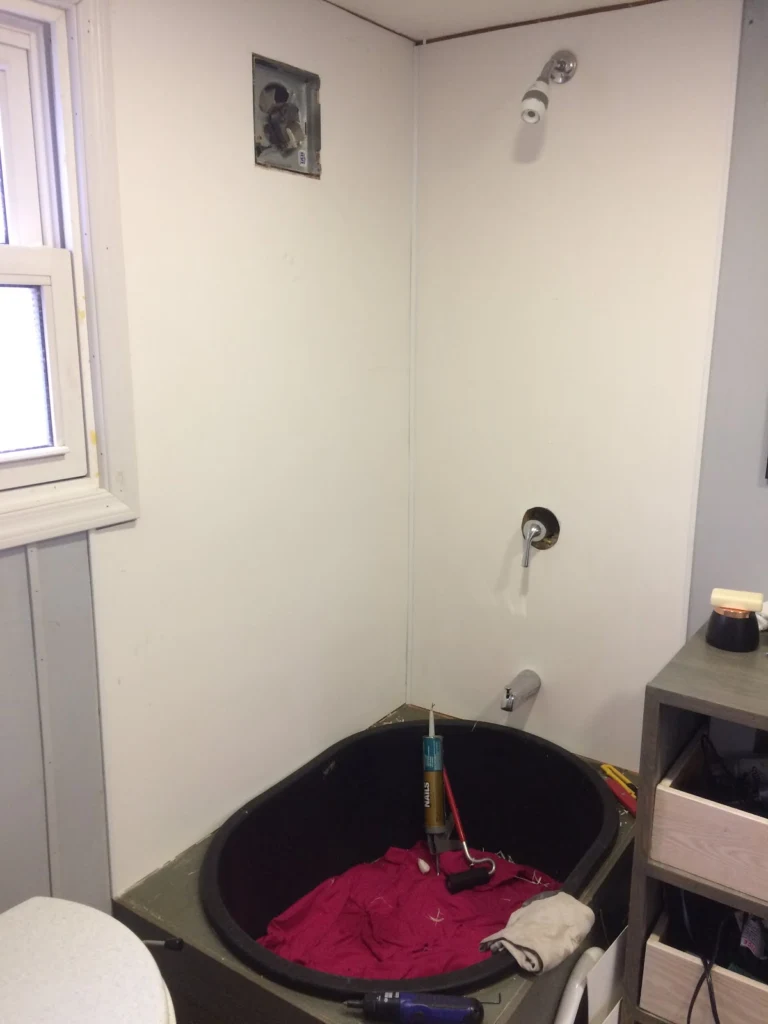
We cut one piece for each wall, then made a frame out of 1×1 boards to go around the tub lip so our new top would have something to sit on and be flush with the tub, thus preventing puddles. We–very carefully–measured and cut out a topper to go over the frame and the tub, cut pieces to trim the edges and make it look all clean and snazzy, and caulked the crap out of everything.

Is it perfect? No. Apparently even with killer wall panel adhesive and a vinyl roller tool we still can’t seem to mount walls without getting that weird bubbly effect here and there. But I bet you can’t tell. I can tell, but I’m hoping you can’t.
It’s just another adventure in DIY tiny house living!
Alisha is a freelance outdoor journalist and photographer based in Ogden, UT. She loves backpacking, hiking, mountain biking, kayaking and snowboarding (even though she’s terrible at it). She’s also pretty sure she’s addicted to coffee. alishamcdarris.com