Get the best deals on flights, rental cars, and hotels for this destination.

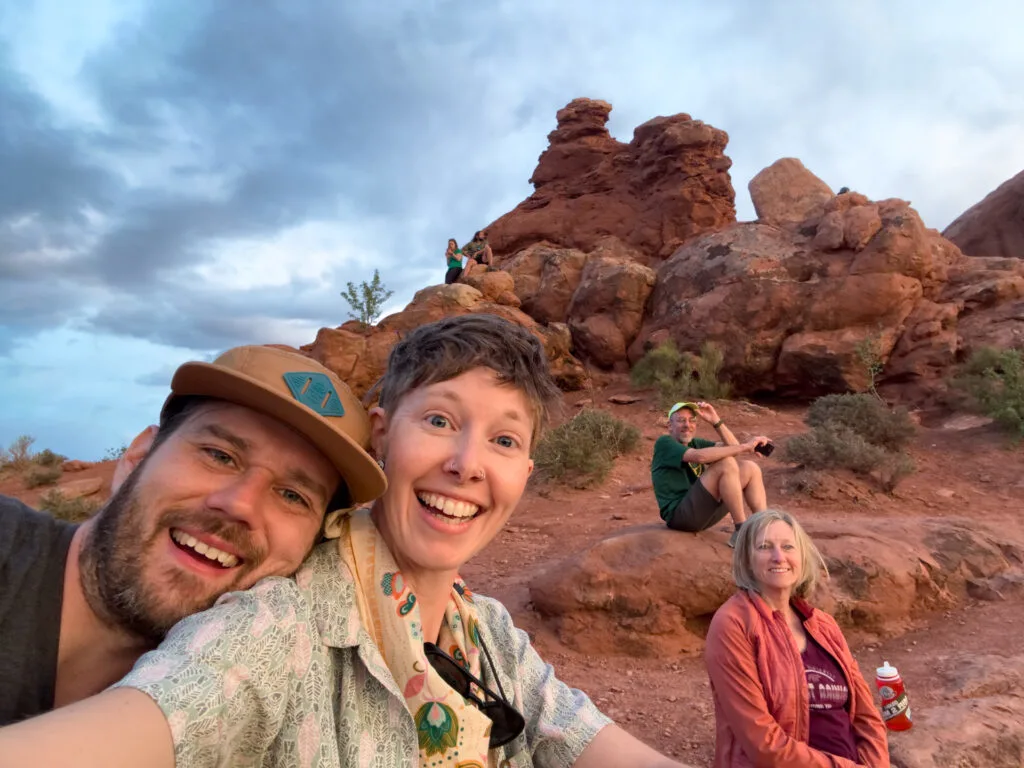
We recently visited all five Utah national parks (known as the Mighty 5) in one road trip. With my parents! While Josh and I have been to all five before, including on road trips, backpacking trips, bikepacking trips, you name it, but this was the first time my parents had ever been to any of them. So they flew over, we picked them up at Salt Lake City International Airport, and we hit the road for a 10-day road trip for the ages. Want to plan your own Utah national parks road trip? Here’s our route and recommendations.
Remember: lots of park employees have been laid off thanks to the current presidential administration, and even more are operating in a state of limbo, so be kind to rangers and park employees, be patient, and show these parks and park employees your support before, during, and after your trip.

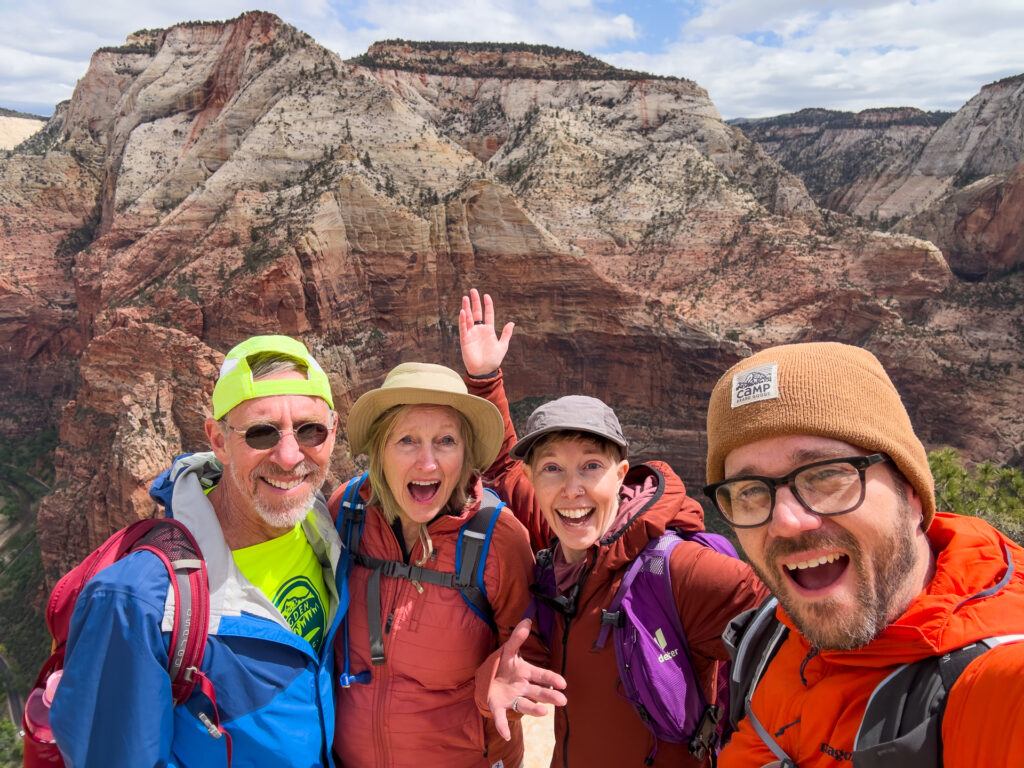
Stop 1: Zion National Park
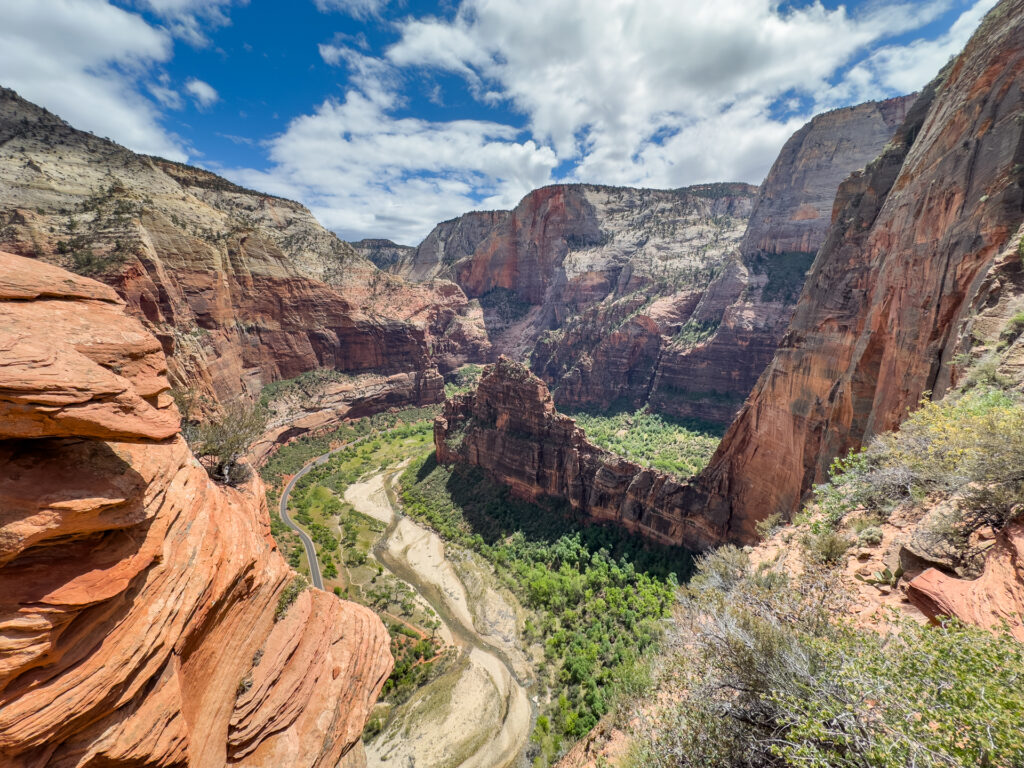
Zion National Park was Utah’s first. It’s also one of the most popular given its drivable distance from both Salt Lake City and Las Vegas. The park is a busy one, indeed, and for good reason: it’s home to massive canyons, meandering rivers, sweeping views, rolling slick rock, and plenty of wildlife (including bighorn sheep).
Camp inside the park like we did (we stayed two nights) or stay in one of the many unique accommodations surrounding it, but book early during spring, summer and fall because this park is busy! Fortunately, there’s lots of dispersed camping between Hurricane and Springdale if you’re in a pinch. Also, while you don’t need a timed entry reservation to enter the park, most of it isn’t drivable and there’s limited parking at the visitor center, so if you’re not camping inside the park, arrive early (before 7:30am) to nab a parking spot at the visitor center so you can take the shuttles to your preferred trailhead. Shuttles run outside the park, too, but expect to pay $30 or more a day to park in Springdale.
Recommended Hikes
Angel’s Landing: This is one of the most talked about hikes in the park. And for good reason: it’s extreme. The last section (which requires a permit) is narrow and steep with drop-offs on either side of the massive fin you’re climbing up hundreds of feet high. The trail is often so narrow you have to take turns passing people coming from the other direction. Chains line the rock walls for added security. There are big step-ups and step downs. It’s not for the feint of heart (or those terrified of heights). But the views are epic and you get an amazing Birds Eye view down the canyon from the top, which is a great place to stop and rest and have a snack. You will need to apply for a permit to hike it, and permits are drawn via a lottery. If your name wasn’t drawn in that one, you can try again the day before you want to hike it, too, which is how we got our last permit. Still didn’t luck out? Hike the West Rim Trail instead. You’ll get many of the same views but without the extreme, narrow, harrowing route.
The Narrows: For a truly unique hike, head to the Narrows. While the path to get there is easy, paved, and dry, the actual trail is almost entirely in the water. You’ll slowly wade through the Virgin river (as you try not to stumble and end up in the drink) and walk between high canyon walls that get fairly narrow from time to time. It’s an expensive hike if you have to rent waders and sturdy walking sticks (about $60 from Zion Outfitters), but it’s free in the summer when its nice and hot outside if you don’t mind a little cold water. Just make sure to bring a sturdy trekking pole, durable shoes and a dry bag for your gear and electronics as the water can easily be as high as your chest in some seasons. You can also get a backcountry permit to camp way back down the Narrows.
Extracurricular Activity
Explore downtown Springdale. There are tons of restaurants, cafes, galleries and more to keep you occupied in the evenings or on a rainy day. Stock up on groceries at the small supermarket or shop for locally-made goods. You’ll even find vegan and gluten free options (including treats) at a few cafes. You should also absolutely drive through the tunnel (whether or not you’re going to Bryce next) because on the other side is a whole new landscape of slick rock, bighorn sheep, and a natural playground like no other.

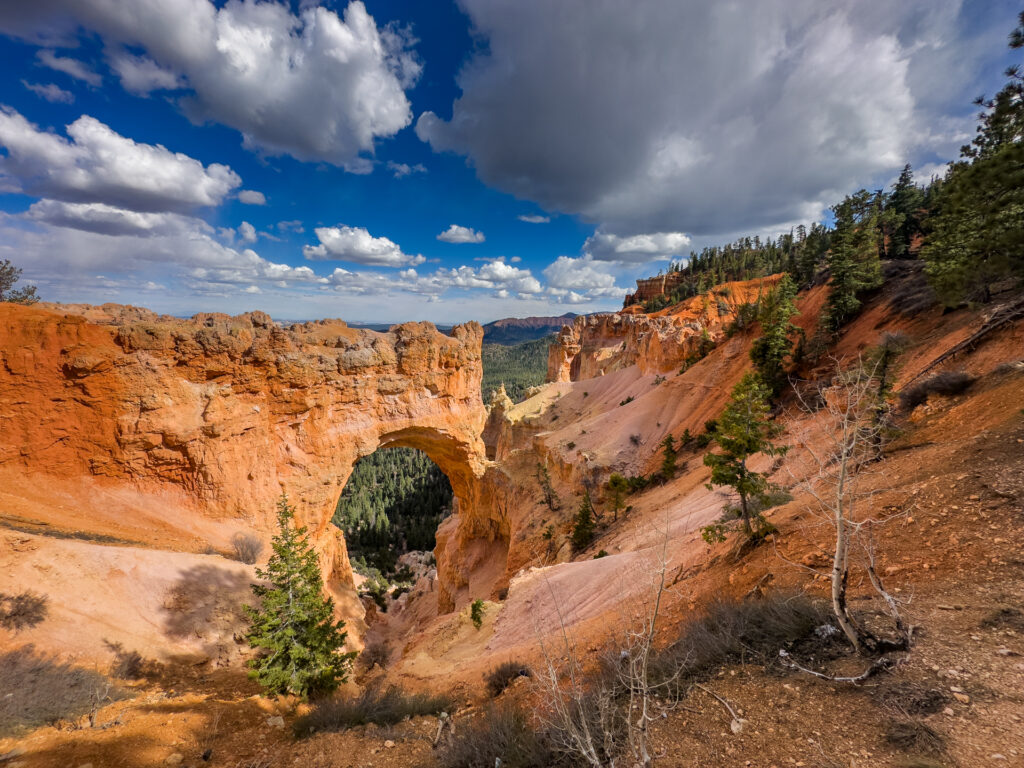
Stop 2: Bryce Canyon National Park
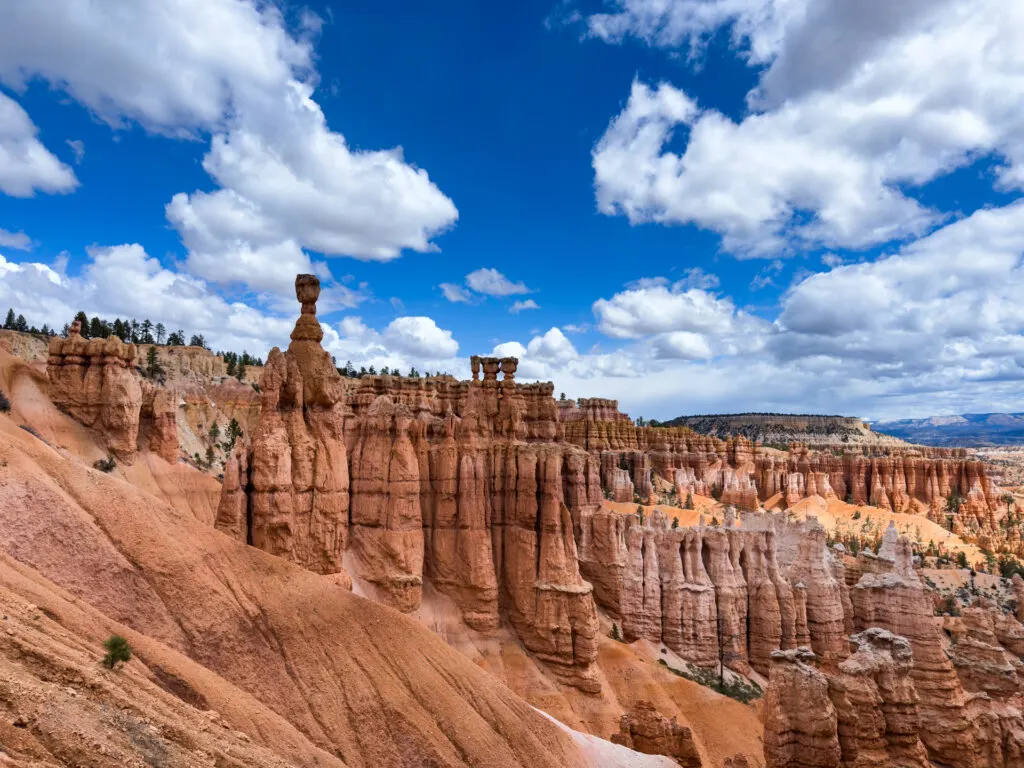
It’s a controversial opinion, but I stand by it: Bryce Canyon is one of, if not my number one, favorite Utah national park. The hoodoos! The colors! The scenery! The variety of landscapes as you venture deeper into the park! It’s absolutely stunning. There are tons of majestic viewpoints all the way down the 18-mile park road, but the main Bryce amphitheater is where most of the action is (and where the shuttle goes). That said, it’s easy to drive past the amphitheater to some of the more distant attractions, including all the way to Rainbow Point at the end.
Do keep in mind that it’s a popular park, so parking is often limited. Fortunately, there’s a free and easy to use shuttle system that runs not only within the park, but to several free parking lots outside the park so you can simply park and ride. A paved multi-use path also offers the option to walk, run, or ride into the park to explore. The Scenic Drive to Rainbow Point at the end of the park is open to private vehicles (except in winter) and there are lots of stunning lookouts and trails along the way. Plan to stay for at least two nights.
Where to Stay: Ruby’s Inn RV Park & Campground
Couldn’t get a campsite reservation inside Bryce? No sweat. Book a tent or RV site at Ruby’s Campground. It’s quiet, picturesque, there’s a park shuttle stop, and it has some of the nicest campground bathrooms and showers we’ve ever seen. It’s also located right on the paved multi-use path that goes into the park in case you brought your bikes or are keen for a nice stroll.
Recommended Hikes
Queens Garden and Navajo Loop: A popular route for a reason, this 2.5-mile loop takes you from an epic viewpoint at the canyon’s edge down into the beating heart of the park. You’ll walk beside tons of hoodoos, get access to a million photo ops, and meander among the orange rock before climbing back to the top. It’s a beautiful hike full of stunning scenery that shouldn’t be missed. To beat the crowds, get up early or start late.
Sheep Creek Connector: There are plenty of cool hikes in the park, but we were quite taken with a short out-and-back (that can also be done as a more strenuous 4-mile Swamp Canyon Loop) on the Sheep Creek Connector Trail because it was so uncrowded and so very different than other areas of the park. While you do eventually reach hoodoos before dropping down into the canyon, the first part of the route is a quiet and easy ramble through fragrant and beautiful ponderosa pine forest. And because the shuttle doesn’t go to the trailhead lot and most people just enjoy the view from the lookout and then move on, we had the whole trail almost entirely to ourselves.
Extracurricular Activity
Rent an e-bike from Bryce Canyon EZ Riders, which is located just a few miles outside the park. Since it’s right on the lengthy, smooth, paved bike path, you can even hop on a bike, ride to the park, and stop at lots of the most loved overlooks, trailheads, and the visitor center. In fact, it’s a great way to explore the busy park without having to get up early to find parking or rely on the shuttle system to get you around the park. You can easily rent a bike for a couple hours or a full day, ride with the assist on, and see plenty of epic scenery in no time flat.
Stop on the Way: Escalante and Grand Staircase Escalante National Monument
We love a friendly desert oasis, and Escalante is just that (plus a perfect place to restock snacks, groceries and supplies). Escalante Mercantile offers easy-to-make meals that are perfect for camping, vegan and gluten free snacks and meal ingredients, and sandwiches and smoothies. Esca-latte Restaurant offers bomb pizza and sandwiches plus outdoor supplies and Utah Canyon Outdoors is a small but impressively mighty outdoor store and coffee shop that carries everything you could ever want or need for an outdoor adventure, plus stuff that’s just for fun. Don’t miss the chance to stop by (it’s one of our faves).
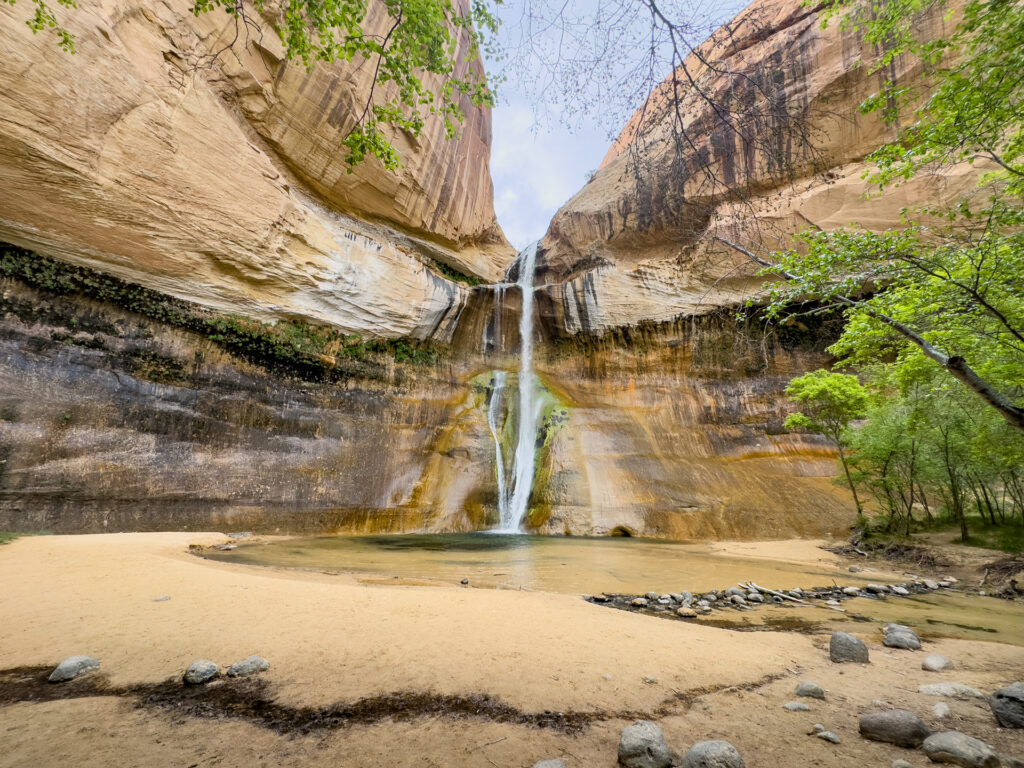
Then take a hike in Grand Staircase Escalante National Monument. Trails abound, but two of our recent faves are the 100 Hands Pictographs (a short but scrambly hike) and the 6-mile round trip Lower Calf Creek Falls Trail, which is easier and absolutely worth the effort for the views and variety of landscapes.
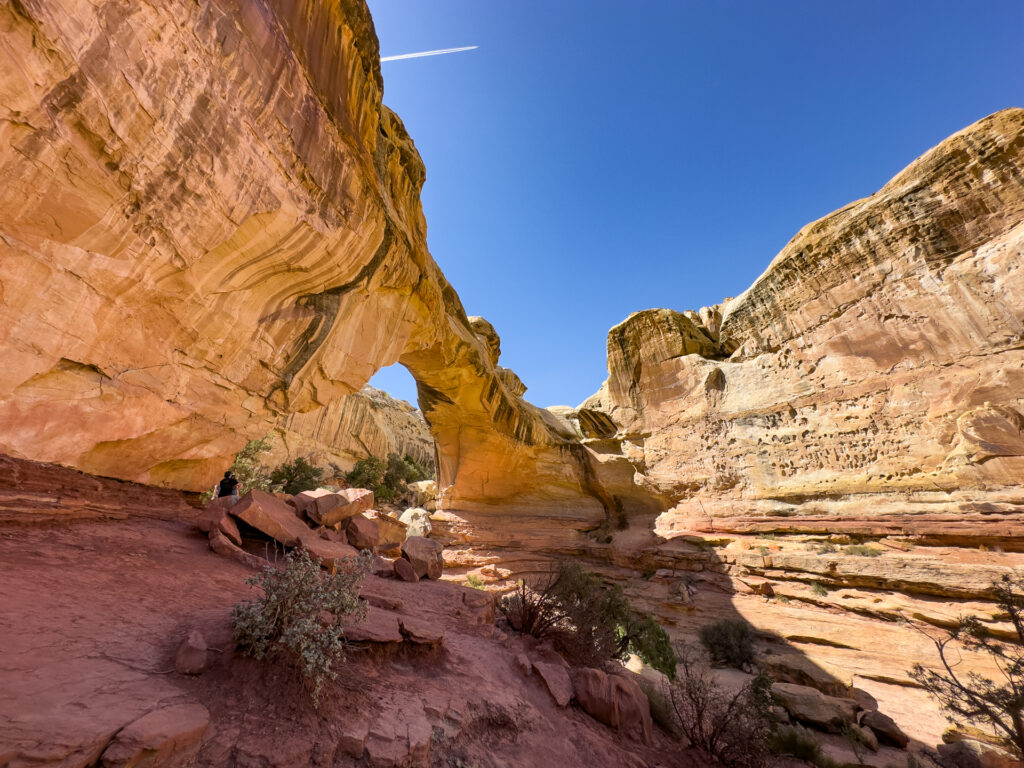
Stop 3: Capitol Reef National Park
Capitol Reef may be the least visited of the national parks in the state. But that doesn’t mean it’s not just as worth a visit. Especially since it’s on the way from Bryce to Moab. Spend a day (as we’ve done in the past) or spend a couple nights nearby. We camped for two nights outside the park so we could explore at our leisure. There’s plenty to see in and around the park and campgrounds and unique accommodations abound outside its borders. There’s even a small town (Torrey) that has a few cafes and other shops and attractions.
Recommended Hikes
Cassidy Arch: Less crowded than some other hikes in the park but just as cool. There are quite a few rock steps during the first portion of the hike, so trekking poles may not be a bad idea, but once you gain that initial elevation the rest of this 3.5-mile out-and-back is less strenuous. At the top, you’ll get uncrowded views of a big ‘ol arch plus plenty of rock to wander around on to enjoy big views of the surrounding canyons and features.
Hickman Bridge: Another popular hike, the 1.8-mile hike is challenging but short. The payoff is a good one, though: a massive stone bridge carved by wind, water, and time. It’s quite the impressive structure, but the journey there is just as pleasant thanks to desert wildflowers and tons of quirky and curious rock formations, indentations, and structures. In fact, my dad had clever explanations involving aliens for many of them (lol).
Extracurricular Activity
Like Cider or Mead? Check out Etta Place Cidery. The small space is hopping after 5:00pm, but the ecclectic indoor and sunny outdoor space offers flights, nice snacks, and chill vibes. It’s the perfect place to rest your feet and relax after a long day of hiking.
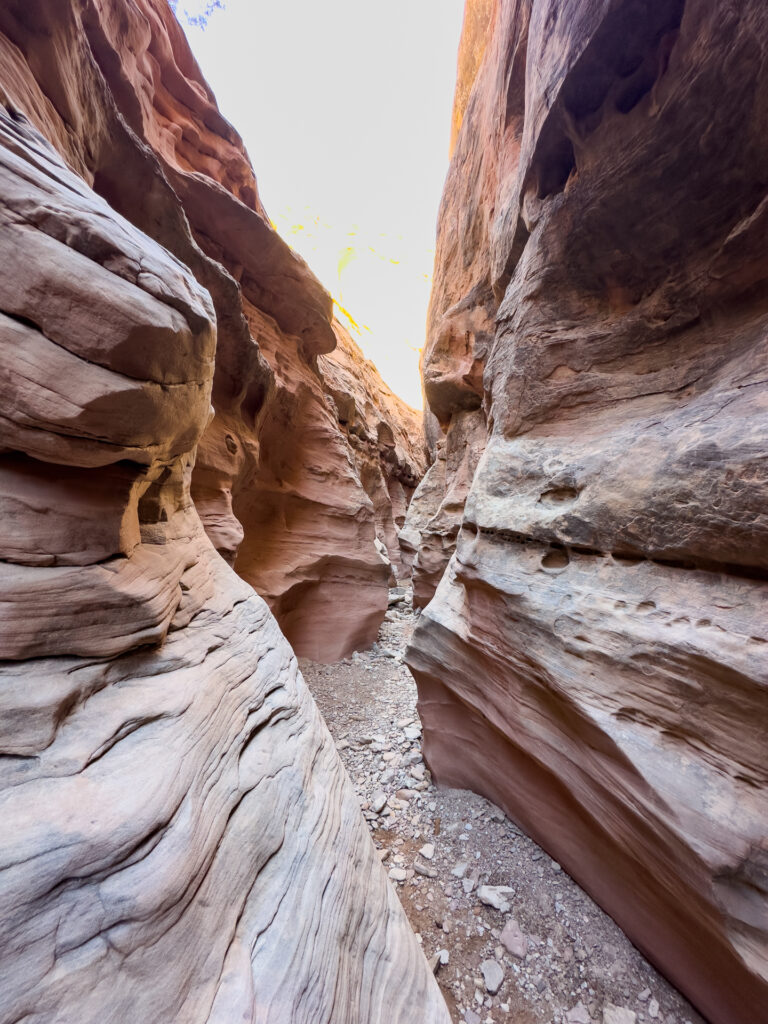
Stop on the Way: San Rafael Swell and Little Wild Horse Canyon
Sometimes the most memorable hikes aren’t in the national parks at all. So if you have the time, take a short detour (30 min each way) to Little Wild Horse Canyon located just outside Goblin Valley State Park (also a fun stop) to explore a mesmerizing slot canyon. You can make it a 8-mile loop with Bell Canyon Trail, but we also love it as a 5-mile out-and-back so you spend more time in narrow canyons and less time on ATV roads and in full sun.

Stop 4: Arches National Park (and Moab)
We love Arches for so many reasons: the park road gives you an impressively up close and personal look at the massive rock structures, there are lookouts galore, short and longer hikes abound, you can often walk right up to and around and through features, and the colors! It’s simply a stunning park and is easily one of may favorites (my mom agrees). We made Moab our base camp for 4 nights so we could spend several days exploring both Arches and Canyonlands, plus chill in Moab, which is a cool desert town we never get bored of.
Pro tip: if you weren’t able to get a timed entry reservation, don’t sweat it; you can enter without one before 7:00am or after 4:00pm. In the summer there’s plenty of daylight to tackle a few miles before sunset if you enter later than 4:00 AND you can enjoy fewer crowds, more parking availability and spectacular sunsets. In fact, golden hour may be the very best time to be at Arches in my opinion.
Where to Stay: WorldMark by Wyndham
At the end of a long trip like this, it’s nice to kick back in a hotel, shower in a real bathroom, lay by the pool, and have a comfy place to relax after long hikes (and also repack all your bags, do laundry, and prepare for the trip home). And whoa was WorldMark by Wyndham the perfect place to do it. There were views, comfy rooms, home-like amenities, and a stellar pool. You don’t even have to be a timeshare member to stay here and room prices are reasonable for the area, especially considering what you get. Want a premium end to your trip? Stay here.
Recommended Hikes
The Windows: This is my favorite place to chill out and enjoy the sunset. The actual trail is short (about a mile) so you don’t even need a headlamp to get back, there are a number of really cool arches, windows, and features, plus views of the surrounding landscape, and the whole area practically glows at golden hour (about 1 hour before sunset). And yes, it also provides a high vantage point for actual sunset. Plus you can scramble up and through many of the windows for spectacular photo ops.
Devil’s Garden: This trail filled with arches, fins, and epic views can be done as a 4-mile out-and-back or an 8-mile loop (with additional spurs to see more formations). The out-and-back option is by far the most popular thanks to the many unique arches along the front half of the route. It is a touch challenging thanks to a few moderately narrow sections with drop offs on both sides, so keep that in mind. Also, be warned: once you get past all the arches the trail gets pretty primitive and challenging (signs will warn you). You can also complete this one as a backpacking trip as there is a backcountry campsite (permit required) about halfway.
Delicate Arch: Want to see the most photographed arch in Utah? The one that’s on our license plates? Trust us: you do. We won’t lie and say you’ll have the 3-mile trail to yourself, but if you hike early in the morning or later in the evening, crowds are more than tolerable (and you’ll still get a shot at a fun photo of you in the middle of the arch). It’s a stunning view. Just don’t miss the opportunity to wander down to the arch footers to scan the sweeping canyon down below.
Extracurricular Activity
Rent bikes (and bike racks) from Chile Pepper Bikes in Moab. You can get e-bikes or cruisers to ride for miles down the paved path (all the way to Arches if you like) or rent mountain bikes and take them to the world-renowned trails all over and around Moab. The Moab Brands trail system is great for beginners, but we love the Klondike Trails for intermediate rides. Chile Pepper will take care of you and offers all the gear, clothing and nutrition you need pre- or post-ride.
Then just explore downtown Moab by foot. There are vegan donuts (Doughbird), tons of shops with locally-made goods and tons of art. We could wander all day.
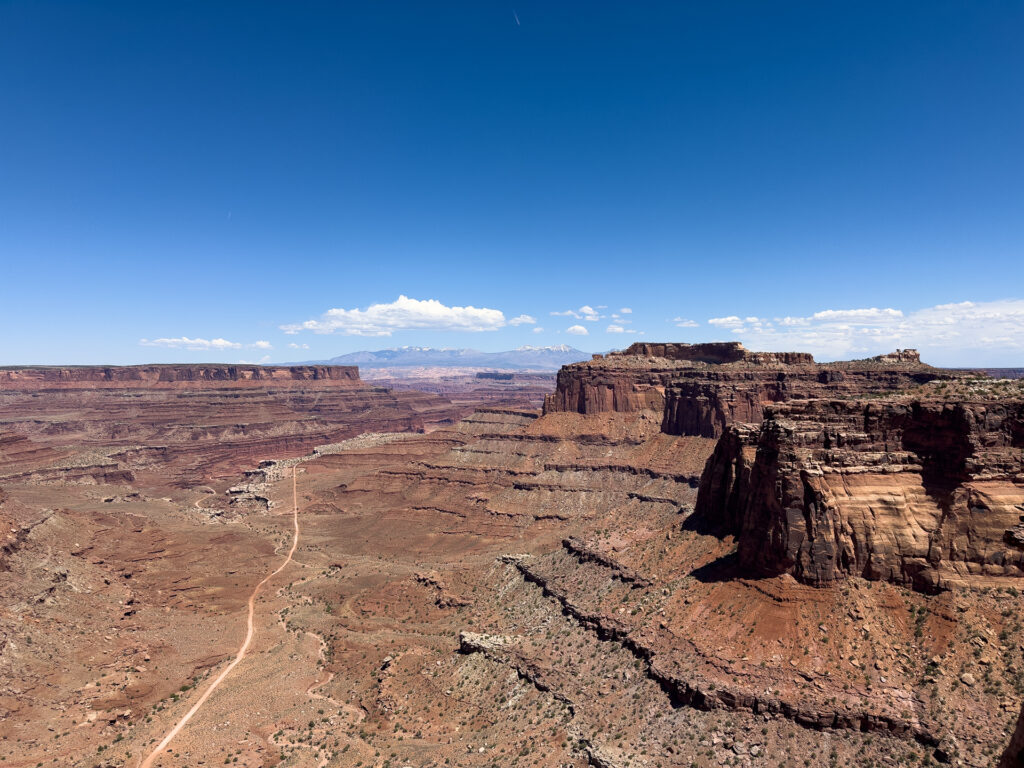
Stop 5: Canyonlands National Park
There are a couple of options for exploring Canyonlands as there are a total of four different and disconnected districts. Island in the Sky is the closest to Moab (30 min drive) and filled with spectacular views of massive canyons, lookouts and hikes galore. If you want something entirely different, head 1.5 hours south to the Needles District where you’ll find lots of red slickrock, hoodoos, and even some riparian environments. The Maze is the hardest to get to and is way off the beaten path–backcountry access is the only option–but you’ll find cool canyons and some of the country’s most renowned life-size petroglyphs. The rivers (Green and Colorado) are the final “district” and can be explored by raft or river guide.
We’ve been to both Needles and Island in the Sky, but for this trip, since it was only 10 days, we were using Moab as a base camp instead of camping closer to the Needles District and we didn’t want a 3-hour+ round-trip drive from Moab, we stuck with Island in the Sky.
Recommended Hikes
Neck Spring Trail: Hike the whole 5.5-mile loop or explore as an out-and-back and make it as long as you want. Either way, the variety and scenery are plenty impressive. You’ll start high at a lookout, then descend into the canyon to hike over rock and colorful sand, spot funky flowers and historic artifacts, and meander past high walls, all with views of the canyons just beyond the plateau you’re on. It’s impressive, to be sure.
Salt Flat and Big Spring Canyon Loop: Located in the Needles District, this 7-mile trail isn’t hard, per se, but in the summer it will be hot as there’s little to know shade. But the trail leads you over slick rock, through riparian zones, down dirt trails, and around lots of fascinating rock formations. Bring snacks and take your time, because the views are one of a kind.
Extracurricular Activity
Bears Ears National Monument is located close to the entrance of the Needles District. Take a hike or enjoy the scenery in this monument that presidents continuously try to shrink or restore. Or head to Moab for dinner, treats, excellent local art, and so much more!

Tips for Visiting Utah’s National Parks
- Arrive Early or Late: You’ll experience fewer crowds and more parking availability. Also, if you visit in off or shoulder seasons, like winter, early spring or late fall, while weather may be unpredictable, crowds will be negligible.
- Check to see if you need reservations or permits: Only Arches requires timed entry permits and only Zion requires permits for only Angel’s Landing. Apply for both early. (These parks require reservations in some capacity this year.)
- Check to see if there are shuttles: Only Bryce Canyon and Zion operate free shuttles. But check schedules and know where it’s easiest to park to catch one.
- Bring sun protection. Lots of sun protection: This is technically the desert ad even if temps are soaring, the sun can be brutal. And on most hike, there will be little to no shade whatsoever. I like a breathable sun shirt and a hat, plus sustainable sunscreen.
- Pack sunglasses: Again, this is the desert, you’re at a moderately high altitude, and the sun is bright plus there’s very little shade so sun is bouncing off the ground and every other surface on every side. So bring your darkest sunnies to protect your peepers and prevent eye fatigue. I like large wrap-around varieties like I wear for mountain biking or something with side shields.
- Carry lots of water. Lots: Especially in the summer, especially if you’re not used to the elevation and lack of humidity, you may not realize how much you’re going to go through. So bring more than you think you need (at least 1 liter per 2 hours is the general recommendation, but bring more in the summer) plus electrolytes because while your shirt may not be soaked (evaporation happens fast out here), you’re sweating more than you think. Stay hydrated.
- Bring a wag bag: You can’t bury human waste in the desert (it won’t decompose like it’s supposed to), so bring a wag bag just incase you have to go #2 on the trail.
- Follow Leave No Trace Principles: As always, follow the principles of Leave No Trace so you stay happy and healthy out there.
Bottom Line: Utah National Parks Road Trip
Utah’s Mighty 5 have been dubbed such for a reason. They’re indeed impressive and inspiring. I feel lucky to finally live in a place where parks like these are within a day’s drive so I’m able to visit them as often as I can manage simply by loading up the car and hitting the road. But if you’re traveling from farther afield, get here fast then take it slow on a Utah national parks road trip. There are so many more trails to explore and sights to experience and 10 days is really the minimum you should plan in order to really see all five. But no matter how many vacation days you have, make the most of them and enjoy every moment.