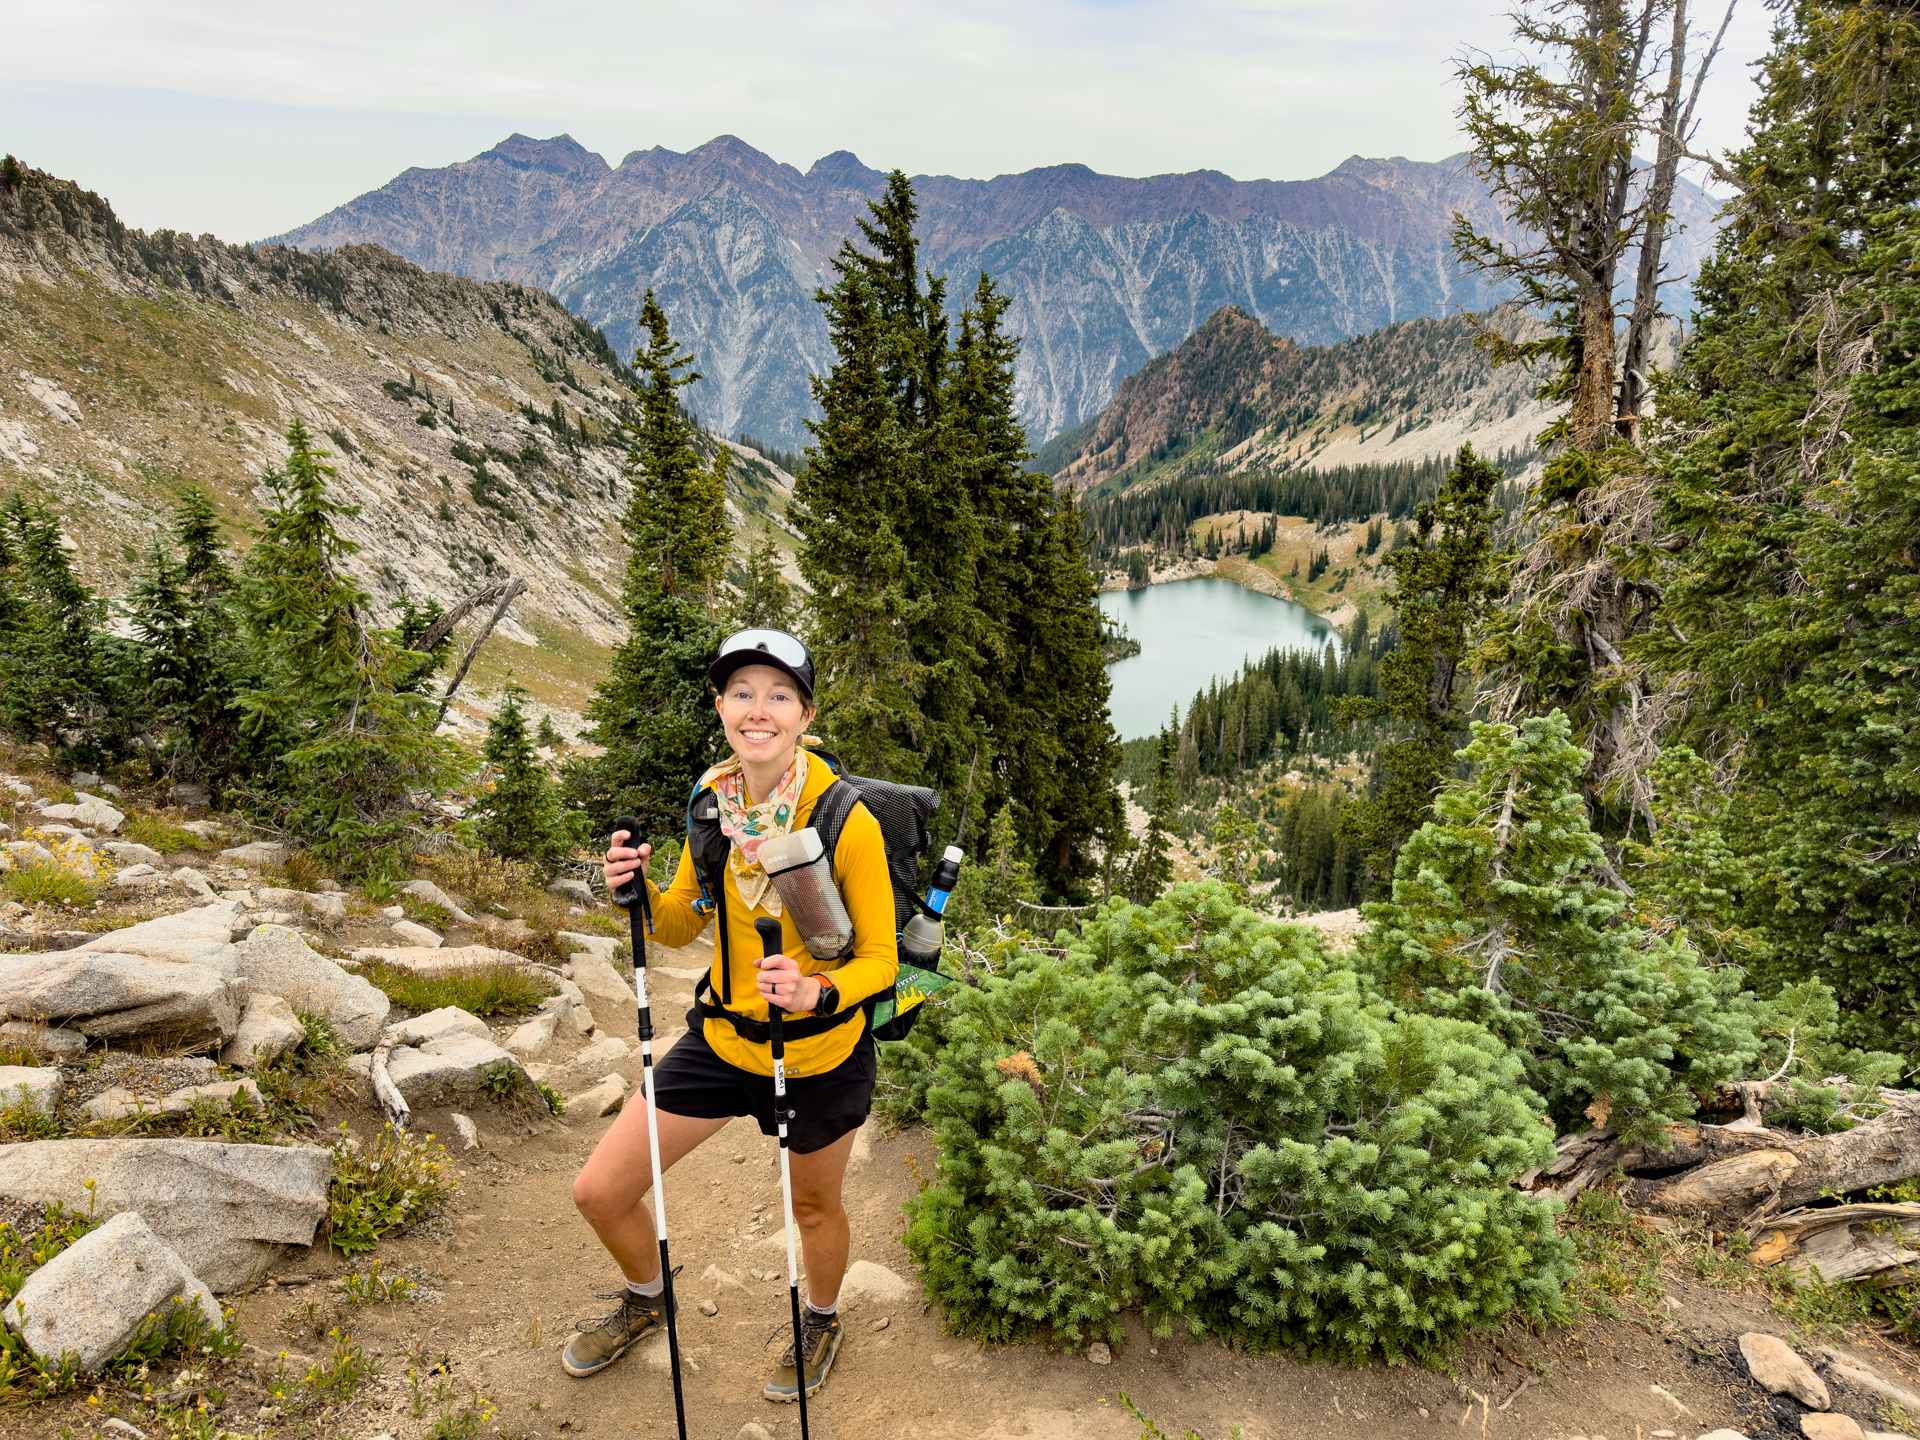
How to Choose the Best Hydration System for Hiking & Backpacking

Without hydration, there is no outdoor recreation. Worst case scenario, if you head into the wilderness with no water, you die. Best case scenario, you feel terrible, your hike feels impossibly hard, and you get mildly dehydrated, which can cause headaches, reduced performance and exhaustion (just for starters). So it doesn’t feel like an overstatement to say hydration is vital to enjoying the outdoors.
But even if you know this to your core, dialing in a hydration system that works for you can be tricky. Not only do you have to know how much water to bring on every hike or backpacking trip, systems can be awkward, heavy, leaky or not work with your new daypack. And if you’re neuro-spicy like I am and obsess over every tiny detail of every system, all of these issues can seem amplified to the point of dizzying frustration.
Fortunately, we’ve tested many systems, have logged thousands of miles on trails across the world, and are outlining here and now how to choose and build a personal hydration system that works for your style, trip length, preferences and environment. All so you can stay happy, healthy and hydrated wherever you roam.
What Is a “Hydration System,” Anyway?
A hydration system is more than just a water bottle or hydration reservoir. It’s a system (not unlike a backpacking sleep system comprised of a sleeping bag, pad and pillow that need to work together in at least some capacity)! A compilation of gear and products designed to work together to meet all your needs on any given trip in the outdoors. Often, the “system” part will come into play on extended day hikes and backpacking trips when a single bottle or bladder is no longer sufficient–shorter day hikes require less complicated solutions.
A system involves lots of considerations, such as:
- How much water do you need to carry?
- Will there be places to refill?
- Will you need to filter water?
- What will you be drinking besides water?
- Are water vessels easily accessible from your pack?
It’s important to think about all of these things when you choose your system. Remember: it’s important that everything work together if it’s efficiency you’re after (and eliminating unnecessary gear redundancies).
That said, chances are you’ll try lots of things before you dial in the perfect system for you. I’m still toying around with new additions and swaps and I’ve been doing this for more than a decade! But hopefully this helps you make an educated decision, especially if you’re new at all this backpacking stuff and starting from scratch. So don’t sweat it: what’s most important is simply staying hydrated.
How to Build Your Hydration System

Step 1: Consider Your Adventure Type
Not all hydration systems are perfect for all types of activity. Some excel more when hiking while others are better for backpacking.
Day Hiking
For short hikes where you’ll be on the trail for a few hours or less, it’s less about a system than personal preferences. So opt for a setup that is:
- Lightweight
- Simple
- Easily accessible
- Works well for you
Backpacking & Long Day Hikes
On longer day hikes (3+ hours) or overnight/multi-day backpacking trips, dialing in a system is more important as you balance refills, filtering, electrolytes and other beverages, cooking and routine sipping.
- Strategize capacity and refills so you only carry as much water as necessary. For example, in the desert where water sources are rare, you may need more carry capacity (aka: liters of water). In mountain environments water may be ubiquitous but requires filtering.
- More vessels are required for backpacking when you need to filter water or plan to drink beverages besides water.
Step 2: Choose Your Water Vessel(s)
There are several types of vessels to choose from when it comes to staying hydrated. Naturally there are others, but not many folks are using things like canteens anymore, so we’ll stick with the main three.
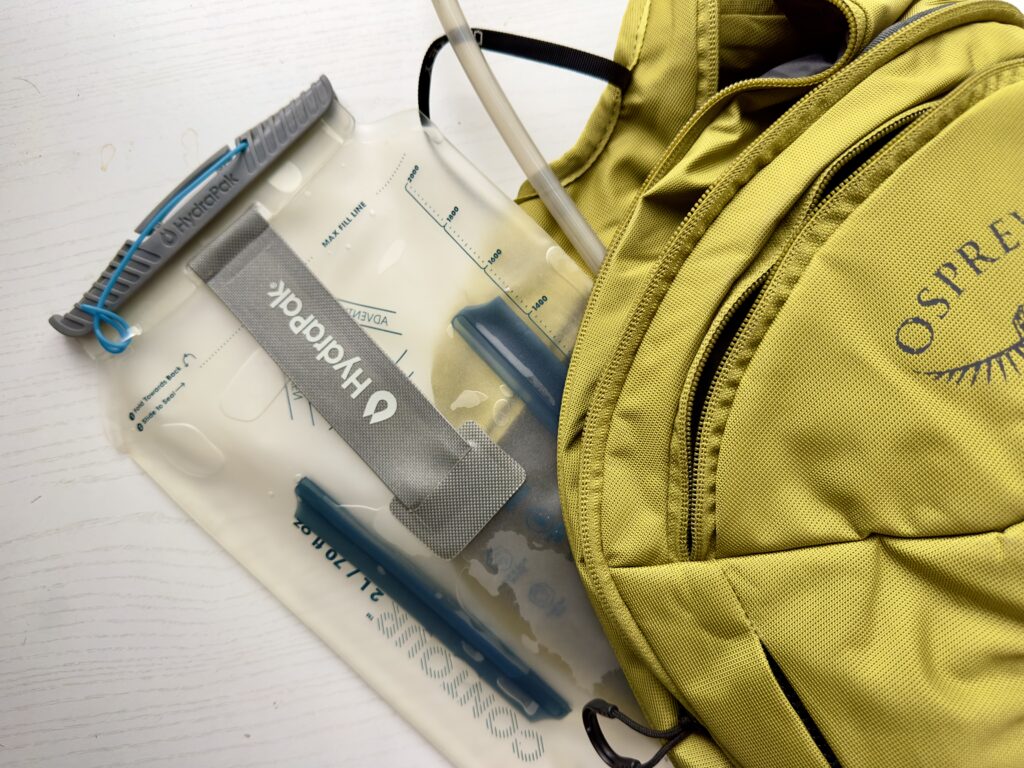
Hydration Reservoirs (Bladders)
Also known as “bladders,” hydration reservoirs are soft-sided pouches designed to be carried inside your pack, usually in a sleeve close to your back with a drinking tube and bite valve that extend out of the top of the pack and toward your shoulder straps. They’re great at keeping weight centered in your pack, plus make it easy to stay hydrated without stopping to pull a bottle from your pack. However, they are more prone to punctures and leaking than bottles and if you add any flavored beverages like electrolytes, they’ll taste like that forever.
- Pros: Easy sipping, high capacity, great for consistent hands-free hydration, keep water weight centered.
- Cons: Harder to refill (especially when your pack is full), harder to track water intake, harder to clean, can’t use electrolytes or hot beverages, not all bladders are compatible with all packs.
- Our fave: The HydraPak Contour is easy to clean, durable, usable with different types of pack hanging hardware, and a pleasure to fill and use. Read our review of the Contour here.
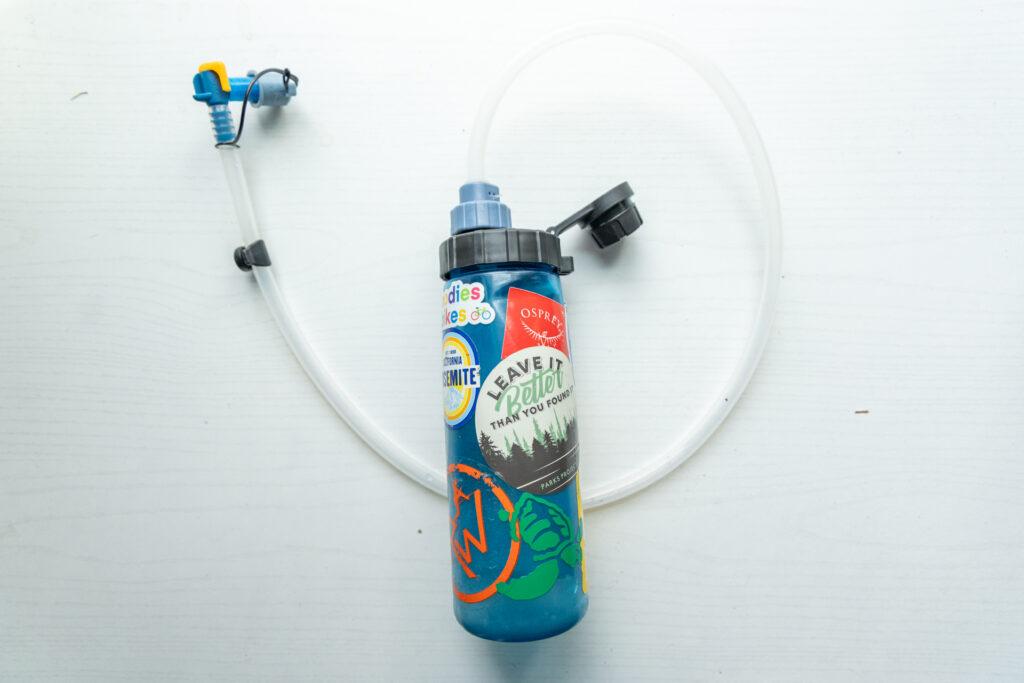
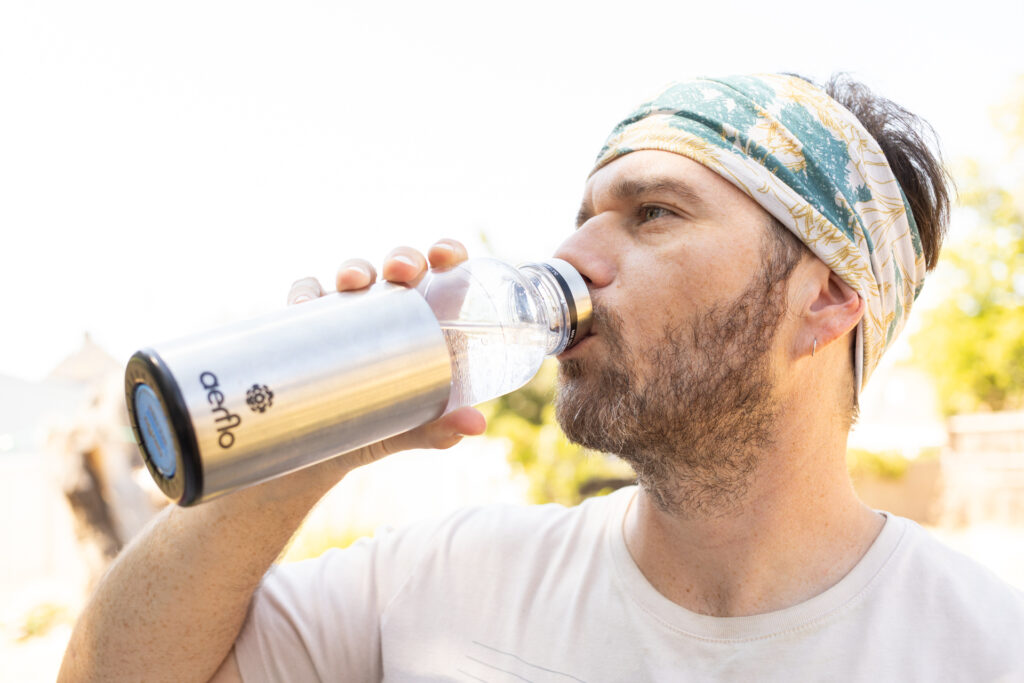
Water Bottles
Water bottles are a classic choice for a reason. They come in a wide range of shapes, sizes and weights, are usually easy to clean, are available in insulated and non-insulated varieties, occasionally have filter straws built-in, and are multi-functional. As in, you can drink water, electrolytes, even hot coffee or tea from them, then use them to roll out sore muscles at the end of the day.
- Pros: Simple, durable, easy to refill, easy to mix electrolytes, multi-functional, hold hot beverages, come in all shapes and sizes.
- Cons: Requires stopping or reaching to drink most of the time, heavier.
- Our fave: The classic wide-mouth Nalgene (with splash guard for spill-free sipping) or lightweight CNOC ThruBottle.
Soft Flasks & Collapsible Bottles
Soft flasks and collapsible bottles are soft-sided vessels often popular with trail runners and fastpackers for their light weight, compressibility and functionality. They pack down to practically nothing and, in the case of the CNOC Vesica, can even connect to a Sawyer filter or similar.
- Pros: Packable, ultralight, easy to fill, easy to mix electrolytes.
- Cons: Can be harder to drink from, often smaller, don’t stand up on their own most of the time, most not suitable with hot beverages.
- Our fave: The CNOC Vesica 1L and CNOC Hydriam.
Pro Tip: Many hikers combine systems. As in, they may use a bladder for their main source of water and a bottle or flask for alternative hydration. If I do that, I like to have two small bottles or flasks, one on each side of my pack, to help keep my pack balanced.
Step 3: Think About Accessibility
When planning a hydration system, one of the most important factors is will there be water available, either from a tap that’s safe to drink from or a natural source like a stream or lake. AND can I access my water easily? Figure that out before you decide what your carry approach will be, then ask these questions.
- How often do you want to stop?: Are you cool carrying fewer bottles or smaller vessels and stopping more often to refill and filter, or would you rather carry more weight in larger vessels and keep moving?
- Pack compatibility:
- Does your pack have shoulder strap pockets for soft flasks or narrow bottles that will make using bottles easier?
- Are your pack’s side pockets easily accessible for you or will you have to ask a friend to grab your bottle for you every time you want to drink?
- If you prefer a reservoir, is there hose routing in your pack to help manage the hose so it doesn’t get in your way or flop all over the place?
- Is your pack stuffed full in a way that will make removing, refilling and replacing a reservoir difficult?
Pro tip: If you can’t easily access your bottles when they’re in your pack or often forget to drink, use a reservoir or a bottle with a hose to make staying hydrated easier. For everyone else, a bottle is usually more versatile and durable.

Step 4: Plan Your Water Treatment Strategy
You should ALWAYS filter (and maybe purify) water from ALL natural sources (except natural springs). Springs are safe because they come straight-out of the ground and haven’t come into contact with any contaminators yet. Just because a stream/lake/river looks clean and clear doesn’t mean it is. E.coli, Giardia, cryptosporidium and more are invisible to the naked eye and can make you very sick, which will ruin your trip (or the weeks after your trip).
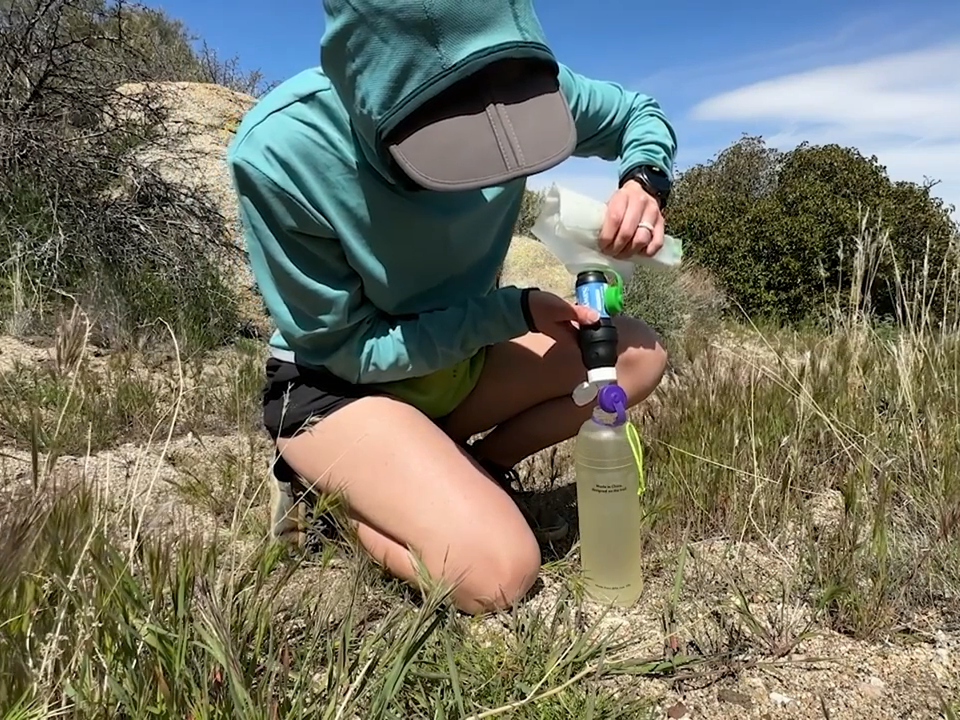
Filters
Filters do just what they claim: filter particles out of the water. Some you can see, some you can’t. If natural water sources are cloudy or have lots of sediment, pre-filter through a bandana or coffee filter. A reliable water filter will take care of most of the rest, including cryptosporidium, bacteria and more. There are several kinds of filters, including squeeze filters, gravity filters, and pump filters. Find our top picks for backpacking water filters here.
- Our fave: The Sawyer Squeeze lasts for 10+ years when taken care of and has the smallest micron filters on the market.
Purifiers
Filters remove bacteria and particulates, but don’t remove viruses, which are more likely to be in water sources close to civilization (think creeks downstream of small towns as opposed to mountain waterfalls). That said, viruses can be anywhere, so some folks prefer to filter and purify. We reviewed several filter-purifier bottles here, but there are other options. (Read a more in-depth explanation of these options here.)
- UV: UV pens and UV bottles like the Larq kill everything, but only if water is clear. So make sure to follow manufacturer instructions so you don’t get sick. They take just a minute or two to purify water, but only handle one liter or so at a time and don’t remove particulates like sediment or PFAS or improve taste. They won’t work on cloudy water, so pre-filter before using a UV pen.
- Chemical treatments: Tablets and drops take longer to treat water (usually 30 minutes), but you can purify large amounts at a time (as long as you have sufficient tablets). Aqua Tabs are our fave because they’re flavorless, easy to use, and ultralight. They don’t remove particulates, though, so pre-filtering is recommended.
- Boiling: Boiling your water kills everything, so is a good choice for backpacking if you already have a stove. But it doesn’t filter particulates, so pre-filtering is still a good idea, even if it’s just through a bandana or coffee filter. Also, water may take a long time to cool down, so boiling is best used for water you’ll be using to cook or make hot beverages, not filling bottles or reservoirs for hydration.
Step 5: Calculate How Much Water You Need
We made a hydration calculator to give you an easy, solid starting point for calculating how much water you need for any given trip, but the general rule of thumb is 0.5 liters per hour for easy hikes in mild temps and 1 liter per hour for harder hikes or when temps are warmer.
- Factors: Plenty of things besides time and distance affect how much water you need, including:
- Heat: The hotter it is and the drier it is (hello, desert), the more water you should be consuming because you’re losing more liquid to sweat.
- Elevation: The higher you are, the less likely you are to realize you’re sweating thanks to low humidity. Drink more than you would at sea level.
- Effort: If you’re working hard, you’re probably sweating more and therefore need more water. Drink up.
Then, think about your strategy. Will you carry in all the water you need or will you refill along the way? That will help determine how many vessels you need and how much weight you’ll have to pack. On long hikes or multi-day treks, always know where water sources will be.

Step 6: Build Your Hydration System
Your system and approach will likely change from hike to hike. What I take on a short day hike looks very different than what I pack on a 3-day trek or even a long day hike.
Lightweight Day Hike Setup
As I mentioned, this will be less of a “system” and more of a preference. Depending on the length of the hike, bring:
- 1–2 bottles or a 2L bladder. Make sure you have a vessel for electrolytes if you’ll be hiking for over an hour.
- Optional: a filter that works with one of those vessels, just in case (for longer day hikes).
Overnight Backpacking Setup
When backpacking, the following is often sufficient as long as there are water sources along your route. That said, I did once pack in 6 full liters for a desert trip in Guadalupe Mountains National Park in Texas where no water was available (heavy and miserable). No filter was necessary, on the upside.
- Reservoir + bottle OR 2-3 bottles.
- A filter that works with at least one of your vessels + backup method like purifier tablets.
Common Hydration Mistakes to Avoid
While you’re thinking about dialing in your hydration system, don’t forget to consider how you’ll actually be staying hydrated. Dehydration is dangerous and is a common cause of trips cut short and emergency evacs. Make it easy on yourself and avoid these common hiking hydration mistakes:
- Not drinking enough: Hydrate early and continuously throughout the day, not all at once.
- Carrying too much (or too little) water: Water is heavy. Don’t carry more than you need. But do carry enough.
- Ignoring electrolytes: Your body needs salt as well as water if you’re active for more than an hour.
- Not testing your system before a trip: Know how it works, but just as importantly, how it all works together. If using a reservoir, check to make sure there are no leaks (it happens more often than you think).
Bonus Tips for Staying Hydrated on Trail
- Set a “sip schedule”: Every 15-30 minutes, stop and drink, especially if you are using bottles or tend to forget to drink.
- Add electrolytes for long efforts: If you’re out there for more than an hour or so, add electrolytes to one of your bottles and sip frequently. If it’s hot, bring a few packets on longer excursions.
- Eat salty snacks: They work to replenish electrolytes, too. So get the salty trail mix and potato chips and munch away.
- Adjust for altitude: The higher you are, the more you need to drink, especially if you’re from near sea level. Read about how to avoid altitude sickness in this article.

My Hydration System
When I hike and backpack, I prefer a water bottle system. Reservoirs are a pain to clean, when backpacking, refilling them or filtering into them is difficult (though there are bladders with in-line filtration), and I hate fussing with hoses.
So when I hike and don’t need to filter along the way, I just fill up a regular ol’ bottle or two, like a Nalgene or an insulated option like my trusty Lightweight HydroFlask.
When I backpack, because I’m carrying more weight and don’t want to stop as often or expend as much energy constantly reaching for my bottle, I add a One Bottle Hydration hose to my regular water bottle so I can sip at my leisure. It’s easy to disconnect the hose from the bottle for refilling or filtering.
When I know I’ll be filtering from natural sources, I often bring a bottle with the above One Bottle hose on it and one CNOC Vesica collapsible bottle that’s attached to my Sawyer. That way I can fill the Vesica from a stream, filter into the hard-sided bottle for sipping, then fill the Vesica again so I have a second full bottle (I leave the Sawyer filter attached).
I also bring a small bottle or soft flask like the CNOC Hydriam just for electrolytes. I can keep that in a shoulder strap pocket for easy access. That system allows me to filter water easily, offers a bottle I can put hot beverages into, provides a way to sip electrolytes, and keeps me comfortably and easily hydrated.

Build a System That Works for YOU
Remember, there is no one-size-fits-all solution to hydration or hydration systems; we’re all going to gravitate to a little something different that suits our needs and preferences. So try a few things, see what you like, what you don’t like, what works for your setup, and it will naturally evolve with time and experience. Just make sure you stay hydrated out there. Wander on.
![REI Labor Day Sale: The 10 Best Backpacking and Camping Deals [2024]](https://terradrift.com/wp-content/uploads/2024/08/REI-Labor-Day-Sale-768x432.jpg)