Cold Outside? Here’s How to Enjoy Winter Mountain Biking: Gear, Tips and Tricks

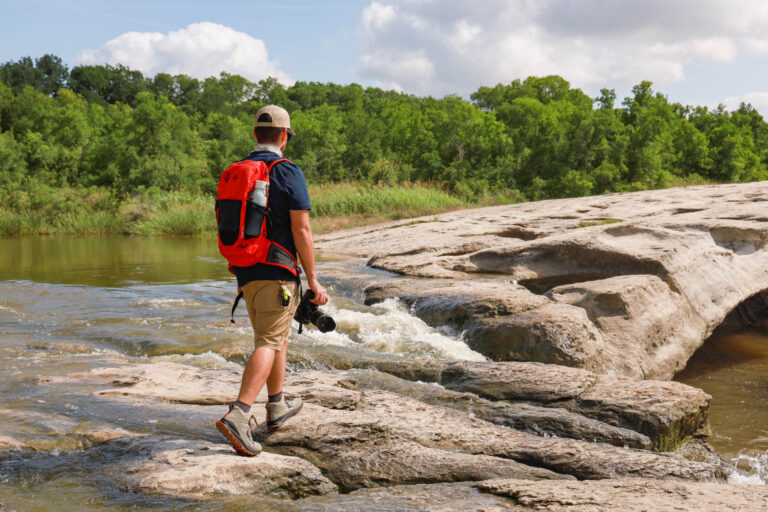
After hiking, mountain biking is the outdoor activity we at Terradrift love most. There’s something about it–the wind in your hair, the dirt on your face, the hard work required and how fun it is to speed downhill–that makes us feel like kids again. But when cold weather arrives, winter mountain biking can get tricky.
Fortunately, you can still enjoy mountain biking when it’s cold out (wether that means winter riding or pedaling in early spring when you just can’t wait any longer) with strategic layering, smart solutions, and the right winter cycling gear. Here are tips and tricks for enjoying the ride in the fourth season, including how to dial in your kit, plus a few standout pieces of gear and clothing that make a real difference, how to layer well, choose appropriate outerwear, and keep your fingers, nose and toes from turning into popsicles.
1. Start Cold (Yes, Really)
If there’s one thing you’ll hear many a wilderness a guide utter, it’s “Be bold, start cold.” I know, no one wants to start cold, but if you feel comfortable in the parking lot, you’re going to be uncomfortable hot in about 90 seconds after you start pedaling uphill. So aim to feel slightly chilly when you roll out. And don’t worry: within 10 minutes or so your core temp will rise.
Why is this important? Besides being glad you didn’t have to stop to remove two layers right off the bat, starting cold helps you avoid getting sweaty from the start.
2. Protect Your Extremities
When you hike, ride, or snowshoe in the cold, hands, feet, and ears are the first to get cold. And if they’re cold, especially if they’re so cold they hurt, your ride is basically over. So take extra care to protect extremities with appropriate winter biking gear and accessories.

Head
Depending on whether you run hot or cold and how cold it is outside, your choice of headwear may vary. In most conditions I opt for one of two options: a slim and breathable under-helmet hat or an ear-warmer (which my delicate ears need even when it’s about 50ºF). A doubled neck gaiter will also do if you already have a few of those.
Gear Recs:
- HeadPeace low-profile hat: I love this hat for its slim and breathable under-helmet fit. It insulates just enough for chilly days but isn’t so thick I have to peel it off 30 seconds into a long climb.
- HeadPeace fleece-lined headband. For more ear-specific protection that lets more heat escape from the head, a fleece-lined ear warmer is the best option. This brand is ethically made in Nepal by women coming out of slavery and sex-trafficking situations who are looking for a way to get back on their feet via employment opportunities in the garment industry.
- Buff Half: A regular buff or neck gaiter will do, but this one is half the height, so it fits more seamlessly under a helmet on cool rides.

Feet
Most mountain biking shoes aren’t windproof, so toes can get cold easily. You can get a pair of cold-weather mountain biking boots, of course, but if you have flat pedals on your bike, it’s easier, cheaper, and more multi-functional to simply wear a pair of winter hiking boots. You can also slide a pair of toe warmers in your shoes at the start of the ride and swap your regular insoles with supportive cork insoles that will help insulate from the bottom up.
Alternatively, if you wear cleats or use clipless pedals, toe- and shoe-covers are available, though they often have mixed reviews.
Gear Recs:
- Reusable boot or toe covers: If you wear cleats, these are an option (flat pedals will just tear them up).
- Ignik Toe Warmers: Place one inside each shoe on top of your toes if there’s enough room.
- SOLE Insole: These performance soles made of recycled cork can keep feet slightly warmer from the bottom up, but also more comfortable when pedaling for hours.

Hands
No cold weather cycling gear kit is complete without gloves. Fingers are often the first to turn into icicles once you hit the trail in the winter. Cold + wind mean gloves are a must. You can wear a warm but flexible pair of gloves that aren’t so bulky they prevent you from maneuvering freely (including grabbing handlebar brakes), but if you do much cold riding you may want to get some dedicated windproof cycling gloves. Opt for the slimmest pair that keep you warm or pair lighter gloves with handlebar mitts, also known as pogies.
Pogies are essentially windproof pockets for your hands that go over your handlebars and shifters/brake levers. They offer unrestricted access to brake levers and shifters while letting you wear less bulky gloves. Pogies tend to be ultra warm and block pretty much all wind, snow, rain, you name it. Extreme riders don’t always prefer them because you can’t catch yourself as easily if you fall, but for less intense rides, they can’t be beat.
Gear Recs:
- Wild Rye Gnarnia Glove: Slim, flexible, grippy, and lined with soft and cozy fleece. These are stretchy, functional, have a snot wipe, are available in several sizes, and are touchscreen compatible. They are only insulated enough for cool weather, not cold, but pair well with pogies.
- Ignik hand warmer: Stick one in the back of your gloves if there’s enough room. Or tape them to the inside of your bar mitts!
- Bar Mitts: The flat bar mitts from the brand Bar Mitts are perfect for mountain bikes and keep your hands warmer than gloves alone and fully protected from the wind. Bonus: They’re super easy to install and then remove when spring arrives.
3. Master the Art of Layering (Not Just Adding Layers)
Don’t turn into a swampy sweatbox or shiver in the cold because you’re wearing the wrong layers. Too many layers leads to sweat. Sweat leads to damp layers. Damp layers lead to misery via feeling way colder. So read our full layering guide for more in-depth guidance, but suffice it to say: fewer lightweight, breathable, adjustable layers that you can add or remove depending on the temp and how hard you’re working are far better than fewer heavy layers.
Not sure what to wear while biking in winter? Dress in systems:
- Base layer: For moisture management
- Midlayer: Active insulation
- Shell: Wind protection (more on that in the next section)
And remember, in the winter, avoid cotton at all costs.

Baselayer
Like most winter outdoor activities, managing warmth and moisture (aka: sweat) starts with a solid baselayer. And for mountain biking, hiking, snowboarding, you name it, choose a breathable shirt and leggings that dry fast, wick sweat, and offer full range of motion. They should be lightweight, fitted and not bulky.
Gear Recs:
- UYN Evolutyon Biotech Base Layer: Made entirely out of plant-based synthetics (not plastic), these feel more like natural fibers on skin, are super stretchy, dry fast, and insulate during cold-weather activity. Plus they wick sweat like a champ, even during high-output activities.

Midlayer
When it’s cold, wear at least one layer between your baselayer and outer layer, at least on your top half. Look for something that’s insulating and moisture-wicking, but also breathable, like an ultralight fleece. If you plan to work (for example, if there’s a lot of uphill on your route or you’re riding hard), breathability is king.
Make your midlayer semi-fitted and stretchy enough to offer full range of motion but slim enough to layer under a jacket. If it’s super cold out, wearing two midlayers isn’t out of the question, but keep them light and breathable.
Gear Recs:
- Houdini Pace Flow Half-Zip: This favorite active layer keeps you warm under a jacket but lets the air flow through when you take your jacket off on hard climbs.
- Squak Grid Fleece: It keeps you cozier than a standard long sleeve shirt but breathes and wicks better than a standard fleece or puffy jacket.
- Outdoor Research Freewheel Half Zip Hoodie: As an outer layer, it blocks wind on cool days. Layered under a shell, it offers warmth and unrestricted movement. Plus, the exterior is moderately abrasion resistant, making it durable enough for brushy trails.
4. Block the Wind
Windproof layers are an essential piece of a cold weather mountain biking gear setup because windchill, not just the thermometer reading, is what really makes winter riding brutal. So prioritize outer layers that block the wind over ones that simply feel cozy warm.

Jacket
You don’t need a heavy jacket–just a windproof one to protect yourself from icy breezes. Just make sure it breathes to keep you from overheating on the uphill. Most rain jackets or shell jackets will do, but a dedicated cycling jacket may have more bike-specific features like a helmet-compatible hood or more accessible pockets.
Gear Recs:
- Outdoor Research Freewheel MTB Stretch Jacket: This waterproof, windproof jacket has a long hem, extended sleeves, helmet-compatible hood, built-in stretch, and pockets for snacks, not to mention vents in the back to aid in breathability. Bonus: It’s super light and packs up small enough to fit in a small backpack or large hip pack.


Pants
Windproof pants are often the best choice for winter and cold-weather riding. They don’t even have to be insulated unless it’s truly frigid out. In fact, layering a pair of windproof pants with the right base layer can do wonders to stave off the chill. Naturally, a pair of hiking pants will do, but pants designed for mountain biking may have more functional features and be worth the investment if you ride in the cold often.
Shell pants work well in cool weather or for those who run hot and soft and are better for active layering and all-weather versatility. Soft-shell pants (stretchy, durable, thicker, windproof and water-resistant pants) are also a great option for those who run cold, ride in colder conditions or don’t need as much layering versatility.
Gear Recs:
- Patagonia Dirt Roamer Storm Pants: These shell pants offer plenty of room to layer underneath, there’s ample room for knee pads and padded shorts, they’re ultralight and waterproof, to boot, and are highly versatile for riding in not just cold, but rain in warmer months.
- Wild Rye Softshell Freyah Pant: These thick and stretchy pants offer cozy warmth and wind protection for women (Wild Rye only makes women’s apparel) who run cold. They have plenty of room for a base layer, knee pads and padded shorts. And yes, there are pockets. Take note: They run large.

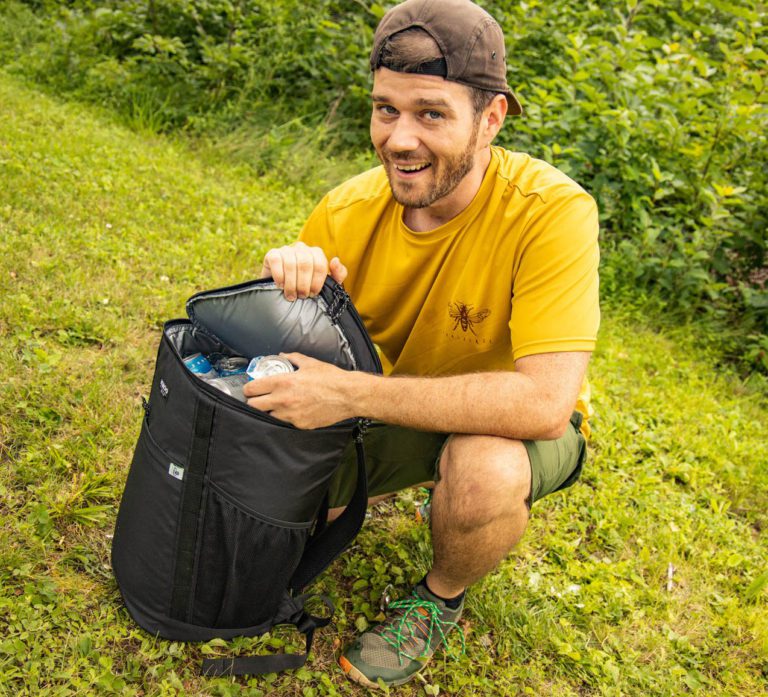
5. Bring a Pack So You Can Lose a Layer
The biggest challenge with winter mountain biking is staying warm on the flats and downhills while also keeping from overheating or sweating too much on the uphills. So be proactive with your layers. Unzip early if you know you’re about to ride uphill. Remove gloves for a few minutes if necessary. Remove outer- or midlayers before you get sweaty. Then put it all back on during breaks or before you head downhill or you’ll get cold fast and may find it hard to warm back up.
Carry a small backpack so you can shed a layer on big climbs and throw it back on for descents. A large hip pack also works for shorter rides when fewer layer swaps are required.
Gear Recs:
- Deuter Rogla 5: This pack is slim and compact, but big enough for an extra layer, MTB essentials and snacks, including via accessible shoulder strap pockets. There are even pockets for soft flasks if that’s how you like to hydrate (but these may freeze in really cold temps).
- Osprey Raptor 14: For those who prefer a pack with a reservoir (don’t forget an insulated tube sleeve), this pack is big enough for a layer or two, repair kit, portable pump and plenty of snacks. It’s Josh’s go-to MTB backpack in all seasons.

6. Cover Your Face and Neck
Don’t forget to protect your neck and face on cold rides. A neck gaiter is just the thing for it. It seals the gap between helmet and jacket and can be pulled over your nose on descents. It’s also useful for mopping sweat, wiping snot, protecting ears, and pulling over your head under your helmet if you forgot a hat. The ultimate multi-functional piece of gear.
Gear Recs:
- Buff: If it’s cool but not frigid, the brand’s Original gaiter is our favorite multi-functional option. On colder days, the Buff Polar Neckwear with Primaloft Bio offers more warmth, more protection from the wind, and is super soft to the touch (plus biodegrades faster into non-plastic particles when it reaches a landfill at the end of its life).

7. Hydrate
When you’re cold, you don’t typically feel as thirsty and it’s easier to avoid drinking and thus become dehydrated. Especially if water is ice cold, it’s not nice to drink. If you use a hydration reservoir without an insulating sleeve on the tube, it could freeze solid, making hydration impossible. So when it’s cold out, opt for an insulated water bottle. Consider adding your favorite electrolytes to slightly warm or room temp water to make it easier to drink.
Gear Recs:
- CamelBak Podium Bottle: Made of (mostly) steel instead of plastic, it’s insulated, keeps water from freezing, and is a breeze to use.

Other Winter MTB Tips + Tricks
- Dig ice out of cleats: Tend to get snow or ice stuck in your cleats or shoe tread? Bring an expired gift card or credit card or use an old tire lever to scrape it out before clipping back in.
- Wear large glasses: Donning ski goggles is an option if it’s truly frigid out, but a large pair of sunglasses like the Vallon Watchtower or Ombraz Refugio can also help keep some wind out of your eyes.
- Consider wet lube for your chain: Most chain lubricant is ideal for dry or mixed conditions. But if you’re riding in snow or slush, consider using MountainFlow petroleum-free, PFAS-free lube for wet conditions.
- Reduce tire pressure: When the ground is frozen, a little less air in your tires can help absorb impact and increase surface area and traction. A few PSI should be enough.
- Bring a hot drink: Whether you bring an insulated mug of hot tea, coffee, or hot chocolate in your bag for mid-ride or leave one in the car for post-ride, a hot beverage is a stellar way to warm up when it’s cold.
- Leave extra layers in the car: Especially if it’s wet, stash a spare pair of cozies in the car for after the ride (I love a fleece set or regular old sweats). Definitely have warm shoes to change into. That way, if you’re frozen, you have dry clothes on hand.

Bottom Line
Staying warm while winter mountain biking is about managing moisture, keeping extremities toasty, blocking wind, and adjusting layers as you go. After all, you know what they say: There is no bad weather, just bad clothing. Dial in your system and you might even start looking forward to those 25°F trail days. Wander on.