How to Repair Outdoor Gear from Jackets to Boots (A Comprehensive Guide for Beginners)

Have a puncture in your sleeping bag? A sticky zipper on your favorite backpack? A tear in your ski shell?Don’t trash it, repair it! Yup, most wear, tear, mutilations and malfunctions in everything from snow pants to puffy jackets can be fixed. Bigger fixes like busted zippers may sometimes necessitate letting a pro take a stab at it, but holes in fleece, rain jackets that aren’t waterproof anymore, tears, slices, and peeling boot soles can often be fixed right in the comfort of your own home. Frequently, you don’t even need to know how to sew (though basic skills do come in handy).
Why repair your gear? There are plenty of reasons:
- It’s sustainable: You can keep your gear out of a landfill longer and prevent new products from needing manufactured.
- It tells a story: Every fix tells a story of all the cool places you’ve been and the things you’ve done.
- It makes gear unique: Want to stand out on the trail? Patches and repairs can make gear unique.
- It can be a point of pride: Heck yeah you fixed your gear! If that doesn’t make you the most handy and resourceful outdoorist around the campfire I don’t know what does.
- It save you money: Don’t want to drop a few hundred bucks on brand new gear? Repair it and save tons of cash.
Whatever your reason, repairing gear instead of tossing it (or donating it in an unusable state) and buying new is an all-around good idea. And doing so may not be as hard as you think. Sometimes it’s as simple as applying the right product, slapping on an adhesive patch, or doing a load of laundry. Other times, sure, you may have to buy a new part or learn a new skill (darning, anyone?). But so much of it is doable if you’re willing to try.
Here’s how to sew and repair outdoor gear: everything from tents to jackets, sleeping bags to fleece pullovers, socks to hiking boots. Full disclosure: We’re not repair pros. We’re just active outdoorists who have repaired plenty of our own gear over the years, posses intermediate sewing skills, and have experience with some of the best products for fixes. So if we can perform these repairs, you probably can, too!
Pro Tip: Let the Pros Fix It
Don’t feel confident performing complex repairs yourself? These Gear Repair Shops Can Make Your Old Gear Good as New. Just send them your clothing or gear and they’ll make it right.

How to Repair a Jacket or Backpack
There are plenty of ways a jacket, including a rain jacket, ski jacket, or windbreaker can fail you. Here’s how to fix the most common issues.
How to replace zippers on outdoor jackets
Need to repair or replace broken zippers? If you’re not skilled at sewing (and even if you are), you may want to leave this one to the pros (find trustworthy gear repair shops here). Zippers can be complicated and highly technical fixes, especially on shell jackets that require sealing instead of stitching. So we’re not going to attempt to break down a DIY solution. But in the hands of a professional, it can be done!
How to lubricate sticky zippers (on jackets, packs or tents)
As for fixing stuck zippers that just don’t slide like they should, don’t use crayon or candle wax, which can gunk up the works and make things worse over time. Instead, use a dedicated zipper cleaner and lubricant to clean the gunk out (like oils, sand, dirt, etc.) and get it working as good as new.
How to patch a jacket or backpack
Wondering how to sew a rip in outdoor gear fabric like jackets or windbreakers (nylon or polyester)? If the fabric is meant to be waterproof or the hole or tear is small, a patch is probably your best bet. Plenty of bands make patches, including NoSo, which offers fun, colorful patches and color-matching options and Gear Aid, which we love for fun shapes and a variety of sizes.
Gear Aid Tenacious Tape peel and stick outdoor gear repair patches are also great and come in rolls you can cut to size so you can fix all manner and sizes of holes, punctures and tears.
Make sure the fabric around the hole you’re patching is clean, trim up the edges of the hole if they’re ragged, and stick on the patch. Some patches suggest applying heat from a hair dryer or similar to make sure they’re permanently set, but do so carefully so you don’t damage any surrounding fabric.
Duct tape can work in a pinch, but it will eventually peel and leave a gross residue on the fabric, so avoid it if you can and if you have to use it in a pinch replace it with a more permanent solution like outdoor gear repair tape as soon as possible
Replace hardware or buckles on a backpack
Every once in a while, a buckle or clasp on a backpack with snap. But that doesn’t mean you need a whole new pack. On the contrary, it’s often cheap and easy to find replacement bucket and hardware. Sometimes if you contact the brand that made the pack they’ll send you a new piece for free or for a small fee. But you can also purchase replacement buckles, slides, webbing and bungee pulls at craft or sewing supply stores like Michaels. They usually only cost a few dollars.

How to Repair Clothing
Clothing is often the most susceptible to wear and tear, especially delicate ultralight materials. So knowing how to fix them if they tear or snag can come in handy.
How to darn socks or sweaters
Darning is the process of weaving stitches together over a hole in socks or knit apparel like hemp hiking shirts, but can also be done on fleece and other materials (I darned a hole in a synthetic baselayer top recently). It’s most effective as a fix for holes and tears that are smaller than a quarter. The bigger the hole, the more visible the mend will be, but you can use similar-colored thread to make it less apparent of contrasting colors to highlight the repair.
Grab some hefty embroidery thread in whatever color suits you, a needle, and something smooth to place under the area you’re repairing so you can stretch the fabric over it.
Insert your needle through the fabric from the inside of the clothing to the outside at least a quarter-inch or so away from the edges of the hole (farther for larger holes). This will be your first corner point–you’ll basically be sewing a square. Sew a straight line up one side of the hole, switch directions, and sew back down. Keep the lines close together and always extend them at least a quarter inch from the hole.
When you get to the hole, pull the thread across the opening taut but not tight. You’re not trying to close the hole, you’re covering it. Keep stitching a quarter inch or more on the other side.
Once you have vertical stitches that cover the hole and then some, turn your material 90 degrees and weave stitches in the opposite direction through the fabric. When stitching over the hole, weave the thread through alternating lines of the first vertical stitches to create a basketweave pattern.
Keep going until vertical and horizontal stitches completely cover the hole and feel secure and then step back to enjoy your handiwork.
How to patch clothing with an adhesive patch
Similar to fixing holes in jackets, you can also sometimes purchase a patch for more standard clothing repairs. Think hiking pants or fleece sweaters. Sometimes, all that’s required is a patch made of a similar material. You may even be able to reach out to brands who prioritize repair of their clothing and ask if they offer patches that perfectly match the apparel in question.
Once you have a suitable patch, sticking it on and applying any heat required per patch directions may be enough, but likely, you’ll also want to secure the edges with a sewing machine or hand stitch. On one pair of pants (photo at the top of this article), I cut a larger patch to cover the inside of the hole, cut a smaller patch to fill the hole from the outside, then sewed over all of it with a sewing machine in a zig zag pattern.
How to patch clothing with fabric
If you’re dealing with more of a gaping hole or zig-zagging tear than a little hole, or a more delicate fabric like a flannel, patching may be required. Fortunately, it’s not difficult.
First, select a swatch of fabric that’s larger than your hole by at least an inch on all sides (you could probably get away with half an inch for smaller holes). The material should be similar to the item you’re repairing or the patched area won’t sit or stretch right when it’s done. Choose a matching color for a less obvious fix or a contrasting one for a more visible mend.
If the material is a type that frays, fold the edges over and make sure the patch is still at least half an inch larger than the hole on all sides. That will keep the raw edges of the patch from unraveling after a few wears. Iron the edges so they stay down. Trim up any ragged edges around the hole and pin the fabric patch in place and hand stitch or use a sewing machine to sew a standard running stitch, whipstitch or zig-zag stitch around the edges.
If you feel the patch could use more reinforcement, like if it’s near the seam or on the crotch of pants, hand stitch or use a sewing machine to sew lines or a pattern across the whole patch. That will reduce some stretch, but ensure the patch will hold through just about anything.
Some clothing, like insulated jackets, you’ll need to seal up the inside in the same way or with an adhesive patch. Other items, like pants or flannel shirts, you can get away with just a patch on the inside or outside.
How to Repair Waterproof Gear
Rain jacket, ski shell or snow pants not shedding water like they should? Here’s how to fix common outerwear issues.
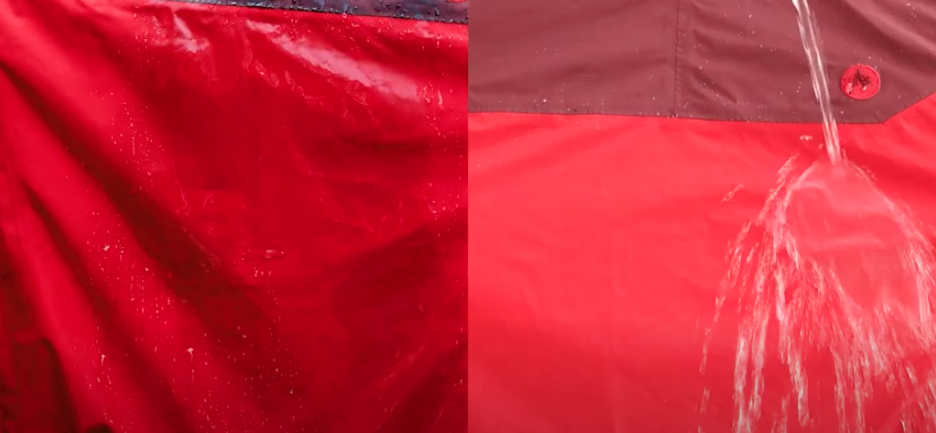
How to re-waterproof gear
Is your jacket or tent not shedding rain like it used to? It probably just needs washed. After all, DWR (durable water repellant) is durable, not permanent, and needs re-treated every once in a while, as often as once a season.
We’ve written a whole guide to re-waterproofing jackets and more specifically, ski shells, that don’t shed water like they used to, but here’s a quick recap for washing anything that claims to be breathable and waterproof or has a DWR coating. Think rain jackets, ski shells, etc.
First, wash your dang jacket. But DO NOT wash it with regular laundry detergent. Regular detergent leaves behind residues on technical synthetic materials that clog up pores and reduce breathability and waterproof functionality by attracting water instead of repelling it.
Instead, use a dedicated product like Nikwax Tech Wash that cleans technical gear and leaves no residue. Follow the directions on the bottle and you’ll have a refreshed jacket in no time.
If you’re outerwear is older and washing didn’t quite take it to like-new condition as far as waterproofing goes, follow the wash with something like Nikwax TX.Direct spray-on or wash-in water repellant. Spray works best for tents and bulky gear that isn’t as easily put in the washing machine and the wash-in works for outerwear.
Tips for patching a tear in waterproof jackets + tents
Have hole or tear in a waterproof jacket or tent? Chances are, the fix is as easy as a stick-on patch. Similarly to fixing a hole in lighter weight jackets and gear, select a stick-on patch from brands like NoSo or Gear Aid. Make sure to select one that’s made of a similar material to the item you’re patching (tents don’t matter as much as jackets) and that the patch is also waterproof. Silnylon patches work great for many tent forts and walls.
Some higher-end gear may even come with complimentary patches. Other brands offer excess material or patches that perfectly match the color and material makeup of their products. So if you have a nice pair of ski bibs and you want a matching patch, reach out to the brand and ask if they can send you one.
Then slap that puppy over the hole (placing another on the opposite side, too, for additional protection and durability, especially if the hole is large) and apply heat to set if required.
I have several stick-on patches on multiple tents and they’ve held for many seasons.
Seal seams
If your tent is leaking water at the seams or your rain jacket stitching is coming apart from your zipper, Seam Grip Sealant and Adhesive works to fix that right up. We’ve used it on a rain jacket whose external shell was peeling away from the pockets around the zipper. The adhesive sealed the fabric back together, made it waterproof again, and still allowed for some stretch and movement.
On tents, we’ve used Tent Seam Sealant to re-seal leaky seams or stand in for peeling seam tape on older or well-loved tents. Clean the products you need to fix first, then apply it directly to whatever area needs sealed. All it takes is one coat applied to the inside of the item (not the side exposed to the elements).

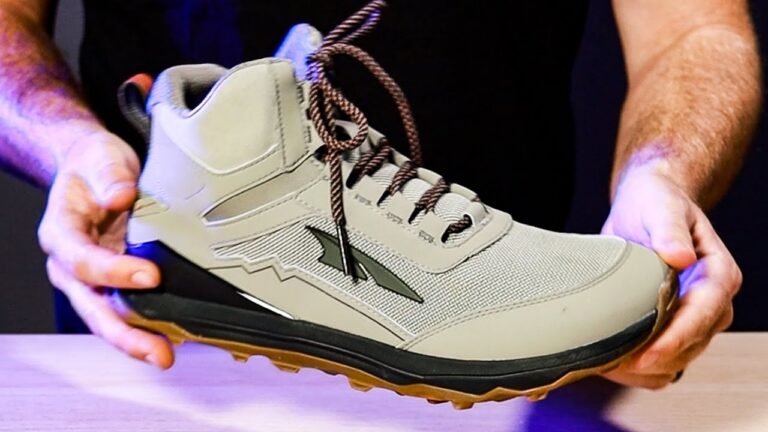
How to Repair Shoes and Boots
Hiking shoes and boots often see the most wear and tear and need the most care and repair.
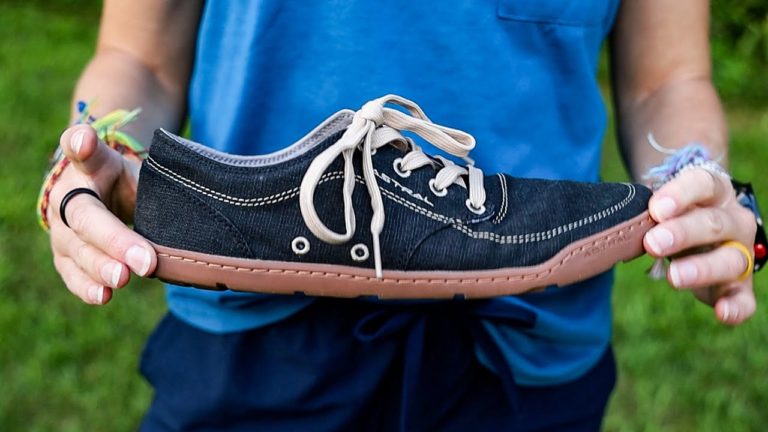
Clean and Waterproof Shoes and Boots
Whether you have synthetic minimalist hiking shoes or big leather boots, they need cleaned regularly to stay in tip-top shape. Fortunately, they’re easy to clean and re-waterproof (if they were waterproof to begin with) so you can revive breathability and water repellency.
Use a product like Nikwax Footwear Cleaning Gel to scrub damp shoes, then once they’re clean, spray on Nikwax Fabric and Leather Proof to add a new layer of waterproofing. It works on synthetic materials and leather. For the latter, if material needs reconditioned, too, apply a product like Nikwax Leather Wax. As soon as your shoes are dry they will be more water-resistant than when they were caked with mud and dust.
How to Fix Peeling Soles
If the problem is the soles on your shoes, fixes can range from easy to complicated. If they are worn through–say you have a hole in the sole–there’s not much you can do to fix it yourself. Not that’s going to be a terribly long-lasting fix, anyway. At that point, it’s time to see if a local cobbler or the brand who made the shoe can re-sole them. Most shoes with Vibram soles can be re-soled. Some brands, like Bedrock and Chaco, offer re-sole programs for their shoes. Doing so costs less than buying a new pair.
If the problem is simply a peeling sole, you may be able to perform a tolerably lasting fix. Just grab a product like Shoe Goo and follow directions to re-adhere a sole that’s no longer connected to your footwear.

Bottom Line
Repairing your outdoor clothing and gear doesn’t have to be difficult. And while you can certainly send it off to gear repair shops for more complicated fixes, it’s often worth it to learn how to do it yourself. So stock up on patches, grab your needle and thread, toss it all in a bag or fancy Patagonia Worn Wear Repair Roll, and fix your gear yourself!